Wednesday, November 9, 2011

Lemon Snowdrops


It may sound odd, but sometimes I forget that other people eat carbs. Living in L.A., I have become accustomed to folks turning down my baked goods because they just don't eat sugar, wheat, or any sort of refined carbs - not that this stops me from baking what I like!

I made these cookies after exploring sophistimom's lovely blog, and took them to my class at UCLA to give as prizes for a bingo game we played to review for the midterm (I mean, even I can't eat carbs ALL the time). The undergrads GOBBLED them up. And the few that were left were devoured by other grad students. Hmm, on second thought, maybe this carb-eating phenomenon is more a feature of the starving student lifestyle than a typical characteristic of the surrounding population...in any case, I was glad these cookies were enjoyed.

Personally, I enjoyed the buttery, sharply lemony goodness immensely - even in the uncooked dough, since there are no eggs in it! If you like lemon, and chewy cookies, you are going to LOVE these simple goodies.


Chewy Lemon Snowdrops

1 3/4 C flour
pinch salt
8 T (1 stick) unsalted butter
zest of 2 lemons
2/3 C sugar
1/4 C agave nectar or honey
1 tsp baking soda
2 T lemon juice
about 1 C powdered sugar, for coating

Preheat oven to 325 degrees. Line a baking sheet with parchment paper.

Whisk together flour and salt in a mixing bowl, and set aside.

In an electric mixer with a paddle attachment, cream together butter, lemon zest, sugar, and agave/honey. Beat until very smooth, about 3 minutes, then scrape down the sides.

In a small cup or bowl, combine the lemon juice and baking soda. With the mixer on low, add the lemon juice mixture and flour mixture. Scrape down the sides of the bowl with a rubber scraper and stir by hand a few times to make sure everything is incorporated.

Roll the dough into balls about one inch in diameter. Bake for 10-15 minutes (less for chewier cookies). Let cool for a few minutes on baking sheets, then roll each cookie in a bowl of powdered sugar to coat before they finish cooling.


Brown Butter Ginger Chews


It seems like brown butter is featured in every recipe that catches my eye these days. I've always been a fan, but I think I'm still realizing just how many flavors can be complimented by the nutty flavor of brown butter. It is especially wonderful in fall recipes with apples, pears, or spices. In these soft and chewy ginger cookies, the butter unfolds another dimension to the flavors, giving it a subtle complexity - that je ne sais quoi. And with a bit of sea salt on top, yum!


This was also the perfect way for me to put to use my new melon-ball sized scoop, which greatly simplified the process of forming the cookies. I'm always put off by a recipe if it involves rolling each cookie individually by hand, but with the scoop it was much quicker to portion out equal amounts of dough. Since I didn't roll each ball carefully to make them perfectly identical, they had a rougher finished quality to them, but they did maintain their height because of the scoop shape - which left them chewy.


Brown Butter Ginger Chews

Don't forget to leave time for this dough to chill in the freezer!

5 C flour*
4 tsp baking soda
2 tsp ground cinnamon
1 1/2 T ground ginger
1 tsp ground cloves
1/2 tsp salt
1 C butter, room temperature
1/2 C brown butter
2 C brown sugar
2 eggs
1/2 C + 1 T molasses
1 C chopped crystallized ginger (optional, plenty spicy without)
coarse sea salt to sprinkle on top

Brown the 1/2 C butter and set aside (see here for instructions with photos).
In a large bowl, combine the flour(s), baking soda, cinnamon, ginger, cloves, and salt.
In a separate mixing bowl, beat the butters and brown sugar until fluffy (it's okay if the brown butter is still a bit warm).
Stir the eggs and molasses into the butter and sugar mixture.
Add the dry ingredients into the wet in two additions, mixing until combined. Fold in the crystallized ginger if desired.
Let the dough rest, covered tightly in plastic wrap, in the freezer for 20-30 minutes (I ended up leaving it there for more like an hour, not a problem).

Preheat the oven to 375 degrees.
Take the dough out of the freezer and form it into 1 1/2-inch balls.
Place on baking sheets about 2 inches apart, slightly flattening the bottom so they don't roll (not necessary if you're using the leveled scoops of dough).
Press a few flakes of coarse sea salt on each ball of dough.
Bake for 9-12 minutes until firm (less time for more chewy cookies).

Makes about 5 dozen!

I bet these would be great for ice cream sandwiches...with caramel or cinnamon ice cream? Or butter pecan?

*I used 2 C whole wheat flour and 3 C all-purpose flour.


Thursday, July 21, 2011

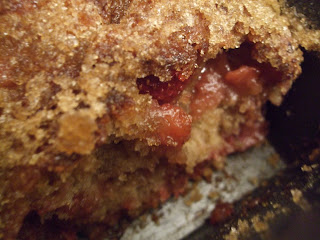
Strawberry Banana Bread


I am super excited about this banana bread. Like super, super excited. Not only is it amazing banana bread, but you can actually taste the strawberries in it. I tend to find that "strawberry" baked goods either have a strongly artificial flavor (which I honestly don't mind sometimes, but it's not my fave) or don't have any strawberry flavor, regardless of whether you crush/macerate/purée/boil them down ahead of time. And I don't usually choose anything strawberry banana if I have a choice (strawberry banana yogurt? no thanks! the banana ruins it!). But this bread, this I choose.

In this bread, you simply add fresh diced strawberries to the batter, and you can taste them in the finished product. Voilà! Of course, your strawberry flavor will be as good as the flavor in your strawberries. The teeny berries I've got here in Berlin, which go bad quickly and don't even look that good in the store, actually have great flavor. They're tarter than the ones I buy in California, but they complement the sweetness of this bread so well. It makes me remember that buying cheap berries in Cali means that they often taste like water, and not much like strawberries (sorry Trader Joe's, on this one account you disappoint). So buy good, strongly flavored berries, and heck, buy a lot of them just to eat them - then if some start to get mushy, bruised, or moldy, you can cut off the bad parts and use the good parts to make this bread.


It helps that there are spices and Amaretto here to greatly adorn the strawberries and bananas, plus a topping of crusted sugar to keep it all happy. I love that I based this recipe on one called "jacked-up banana bread" on smittenkitchen's blog, and I jacked it up some more - replaced some of the bananas with strawberries, swapped the bourbon out for Amaretto, added more butter (accidentally doubled it the first time! darn european conversions), and slapped the sugar crust on top for good measure.

Only make this if you're ready to make your kitchen smell heavenly!


Strawberry Banana Bread

Preheat the oven to 350 degrees, and grease a loaf pan.

In a mixing bowl, place:

2 ripe bananas, smashed
1 C (approx.) diced strawberries

Stir in:
1/2 C (1 stick, ~100 g) salted butter, melted

Then add:
1 C (170 g) brown or raw sugar
1 egg
1 tsp vanilla
1 T Amaretto (or whatever you've got in the cabinet, except vodka, 'cause it's got no flavor)

And then:
1 tsp cinnamon
1/2 tsp nutmeg
pinch ground cloves

Sprinkle over mixture and stir in:
1 tsp baking soda
pinch salt

Then mix in until just combined:
1 1/2 C (180 g) flour

Pour into loaf pan. Bake for 45 minutes, then remove from oven. Generously sprinkle raw or white sugar over the top of the loaf, then wet the sugar down with Amaretto (as with this pine nut cake). Place back in the oven for another 5 minutes, or until a utensil comes out clean. Let cool in pan before serving.

Makes one loaf, and very few dirty dishes.


Yeah, I had to make two after I got a little too experimental the first time around; the cake was great, but I wanted to try to make frosting with quark, which rendered the bread soggy enough to be bread pudding. Which my British roommate liked, so she gets to finish it. For the rest of us, there is this new and improved crusty version.

P.S. It would be great without the sugar crust too, just eliminate that step and bake until a utensil comes out clean. If you like things a little less sweet, you can reduce the sugar in the bread to 3/4 of a cup also.

Wednesday, July 20, 2011

Peach Shortbread


I was debating whether or not to post this recipe, but after seeing my roommates hovering around the kitchen while my newest project came out of the oven with the comment, "that shortbread was amazing," I decided it should be shared (especially since a bit of experimentation just turned some fabulous strawberry banana bread into some kind of bread pudding...oops).

These pics are not the best in the world, but the brown butter in the recipe IS. This is the first recipe I've made that says to brown the butter, then let it solidify in the freezer before cutting it into the dough. That means that you can have the brown butter flavor AND the flakiness that results from cutting in solid butter, so it's definitely a technique I'll use again.

Peaches are one of the cheaper fruits out in Germany now, so I bought some and hunted through my favorite food blogs to decide how to use them. When I came upon this shortbread recipe, I was too impatient to wait for the peaches to ripen before I made them, so I just cut the peach slices realllly thin, macerated them with some sugar, and hoped the unripe flavor would not be evident. It actually worked!

These are not very sweet, but they are flaky, warmly spiced, and brown-buttery. Yes. And easy. They would definitely be good with any stone fruit, apple, or pear slices, but adjust the spices accordingly if you pick a fruit less amenable to cinnamon and nutmeg. The fruit is mostly to add color and texture, since the thin slices do not impart much flavor. The baking time would be longer for firm fruit like apples, so either cut them really thin, or take the risk that your dough will be done before the fruit is soft.


Here we go:

Peach Shortbread

1 C (200 g) sugar
1 tsp (5 g) baking powder
2 3/4 C plus 2 T (359 g) flour
1/4 tsp cinnamon
1/8 tsp nutmeg
1/4 tsp salt
1 C (227 g) unsalted butter
1 large egg
2 peaches, pitted and thinly sliced (1/8 to 1/4 thick; thinner means they turn translucent)

Brown the butter ahead of time in a small pot on the stovetop over medium-low heat. Let the butter melt, foam, turn clear golden, then a light brown color. Stir regularly during this process, scraping off anything stuck to the bottom. Before it browns, you will see steam come up from the surface, which is the water in the butter evaporating, and as it browns you will it smell it becoming a little nutty. As I learned in the cooking class I took in Paris last year, you can use all your senses to track the process of butter browning - seeing the steam rising, the color changing; hearing it foam, crackle, and settle back down; smelling the nutty scent of the final product; tasting and touching come later when it has cooled down! Just be sure not to burn it, which can happen quickly after it's become brown. I tend to under-brown it a bit out of fear of burning it, so the flavor of my butter is less strong than it could be.

Once the butter's browned, pour it into a heat and cold proof vessel and set it in the freezer until solid (about 30 minutes).

Preheat the oven to 375 degrees. Butter a 9x13 pan (I halved the recipe and used a 9-inch round pan, which made it very thin).

In a medium mixing bowl, whisk together the sugar, baking powder, flour, spices, and salt. With a pastry blender, fork, or your fingers, blend the brown butter and egg into the dry ingredients until it is crumbly but well mixed.

Pat 3/4 of the dough into the baking pan, pressing firmly. Lay the peach slices over the pressed dough in a single layer. Scatter the remaining crumbs of dough evenly over the peaches.

Bake for 30 minutes or until the top and edges are starting to brown. Cool completely in pan and then cut into squares.

Friday, July 8, 2011

Lemon Olive Oil Cake


Since I'm currently sharing an apartment in Berlin with six other people who frequently share food with each other, I've been trying to contribute baked goods to the kitchen from time to time. For Europeans, I like to bake simple desserts that aren't too sweet, which could serve as dessert, breakfast, or snack with tea or coffee. I started out with an almond cake, which went over well (and, incidentally, is gluten-free and incredibly easy), and then decided to work out a lemon cake. Lemon and olive oil being a proven flavor combination, I thought it would be nice to have an even quicker alternative to my lemon olive oil cupcakes.


I adapted this recipe from a French vanilla cake recipe; it's a simple, lightly sweet, and moist cake, with a touch of lemon to make it fresh. I replaced about a third of the melted butter with olive oil, added lemon zest and juice, and poured over some lemon glaze for a finishing touch. It formed a nicely browned crust in the metal loaf pan I used, so I'd highly recommend a metal pan if possible!


Lemon Olive Oil Cake
(so sorry, I don't have access to American measuring equipment here, so grams will have to do for now; use Chocolate and Zucchini's conversion page if necessary)

3 eggs
170 g sugar
zest of one lemon
160 g flour
1/2 T baking soda (about 1/2 European packet)
125 g butter
1/3 C olive oil
juice of 1/2 lemon

Preheat the oven to 350 degrees F/180 degrees C. Butter and flour a large loaf pan (i.e., rub butter along the sides and bottom of the pan, then pour about 1 T flour into the pan and shake it around to lightly coat each buttered surface, shaking the excess flour out into the sink or trash can).

In a mixing bowl, whisk together the eggs, sugar, and lemon zest until it becomes frothy and lightens in color. Pour in the flour and the baking soda and whisk it into the mixture as you pour.

Melt the butter in a small bowl, add the olive oil and the juice of half a lemon, and then stir the liquids into the rest of the mixture. Pour the entire mixture into the prepared loaf pan. Bake for 35-40 minutes; it's done when a knife or toothpick comes out clean.

Let cool.


Lemon Glaze

juice of 1 lemon
100-150 g powdered sugar

Place the juice in a small bowl. Stir in enough powdered sugar to thicken and sweeten the juice (it will still be a little runny, but the consistency is not super sensitive). Once the cake has cooled at least a bit, pour the glaze over the cake. Let it solidify, then serve!