Tuesday, February 28, 2012

Potato Pizza Soup


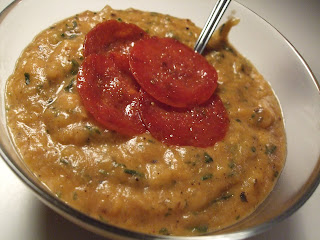
This soup is the product of leftovers from a pizza-making night, plus leftover potatoes from Valentine's Day dinner and a few odds and ends in the kitchen. Pan-roasted potatoes (bake and then pan fry them in canola oil with seasoned salt and pepper) give this a full, toasty flavor (like pizza from a brick oven!); leftover steak fries from a restaurant could work, or leftover hash browns or breakfast potatoes.

I threw in a little spinach to add some green color, and heated up some pepperoni in a frying pan to add as a garnish. The jar of pizza sauce from Trader Joe's has great flavor by itself, so it spiced up the soup nicely. You could always make it spicier with red pepper flakes, or add some fresh basil to brighten it up. Whatever says pizza to you!

This is a dairy-free and wheat-free recipe, and meat-free if you skip the pepperoni.

Potato Pizza Soup

1 medium onion, diced
2 cloves garlic, minced
1/2 C frozen spinach, drained
2 C pan-fried, baked, or mashed potatoes
1/2 C pizza sauce
2 C coconut milk
garnish if desired

Sauté the diced onion in 1 T oil until the onion becomes translucent and starts to brown. Turn down the heat and add the garlic to cook for about 1 minute. Add the spinach and potatoes (I recommend browning the potatoes in a separate pan a little more before this to add more of a roasted flavor). When all the ingredients have heated through, add the pizza sauce and coconut milk, stirring to combine. Heat til boiling, stirring regularly. Once it boils, turn off the heat and remove the pan from the heat. Use an immersion blender or regular blender to purée the soup to the thickness you prefer (take care to not burn yourself if the soup is still hot when you are blending it). Garnish as desired.


Saturday, February 25, 2012

Roasted Pepper Corn Chowder


I'm realizing that all of my soup pictures look practically the same, but do not be deceived! They actually vary greatly from one another, and I'm especially excited about this one. Now that I've got down the necessary proportions for soup ingredients, I'm starting to feel like I can invent my own renditions of dishes. This one is a little spicy, a little smoky, and thickened by puréed onions, peppers, and corn.

This time I riffed off of this corn chowder on The Pioneer Woman's blog, adjusting for the content of my refrigerator/freezer and for my personal taste preferences. I increased the butter, added garlic, eliminated the bacon, substituted in different roasted peppers, added cumin and red pepper powder, but borrowed the idea of thickening it more with cornmeal.

If you keep a can of corn, a box of chicken broth, and some coconut milk in the cupboard, you could make this any time! Unsweetened coconut milk is becoming my cream/milk of preference for cooking, since before it's opened it's shelf stable (so I can just keep it around all the time, unlike dairy products), and after being opened lasts a while in the fridge. That also makes this a dairy-free recipe if you sub in oil for the butter. I've also started keeping a jar of roasted peppers in the fridge, since they are great in eggs, soup, vegetable dishes, and more (Trader Joe's has a nice jar of roasted red, orange, and yellow peppers). I imagine that it would work well with vegetable stock instead of chicken stock, if you want to go completely veggie.


Roasted Pepper Corn Chowder

3 T butter
1 onion, diced
2 cloves garlic, minced
3 pieces roasted red, orange, or yellow pepper, diced
8 oz. whole kernel corn (drained if canned)
1 tsp ground cumin
1/2 tsp red chili powder
4 C chicken broth
2 C coconut milk
3 T masa or cornmeal
1/4 C water

Sprinkle liberally with salt and pepper at each stage of the process.

Melt the butter until slightly browned in a dutch oven pot on the stovetop. Add the diced onion and cook over medium heat until translucent. When the onion starts to brown, turn down the heat a little and add the minced garlic, diced pepper, corn, cumin, and chili powder. Cook, stirring regularly, until the liquid in the mixture has evaporated and the elements become aromatic and a bit browned. Add the broth and coconut milk and heat until boiling, still stirring regularly. Mix the masa or cornmeal in a small bowl with the water, and once the pot is boiling stir in the masa/cornmeal. Turn down the heat, cover the pot, and let cook for 15 minutes. Remove from heat and use an immersion blender or regular blender to purée until it reaches the desired consistency. Season to taste with salt and pepper.

Serve topped with avocado, or corn chips, or green onions, or bacon, or just plain!

Friday, February 24, 2012

Cold-Brewed Iced Coffee


If you have ever been intimidated by the process of making coffee, but enjoy iced coffee, this recipe is for you. Heck, if you just like coffee, this recipe is for you. Nothing could be simpler to make, yet it produces a super smooth, not bitter flavor (what's the opposite of bitter? I'm blanking...I'll just go with smooth).

I got into this recipe when I was in Israel two summers ago, sweating profusely during my 9 am trek to class. I would put out the coffee and water mixture at night, and in the morning stir up some of the coffee concentrate with water, ice, soy milk, and sweetener, thereby mustering up the courage to venture into the 90+ degree morning.

I realize that we find ourselves in February now, but in Los Angeles that means nearly 80 degree weather some days, so some of us can give this a chance. Or bookmark it for a warmer time in other climates. Or drink it in your warm home and imagine you are in a warmer place. No excuses to not make it, see?

Don't forget that this makes a coffee CONCENTRATE - it will be strong if you don't water it down as the recipe indicates. I opted for the new Starbucks Blonde roast, which is the one coffee of theirs that I have ever wanted to buy a whole pound of...smooth is again the adjective I'd choose for this roast. Whatever coffee you use, expect to experience slightly different notes in it with this method.


(the numbers on the measuring cup are supposed to be backwards - to read from above the cup!)


Cold-Brewed Iced Coffee
taken from smittenkitchen

Mix 1/3 C medium-coarse ground coffee with 1 1/2 C water. Leave in a covered container at room temperature overnight (8-12 hours, longer doesn't hurt).

Strain through a coffee filter, fine mesh strainer, or cheese cloth. In a tall glass filled with ice cubes, mix equal parts water and coffee concentrate, adding milk and/or sweetener as desired.

SO EASY! Enjoy!


Wednesday, February 22, 2012

Date Crumble Bars


Unfortunately, I fed my dinner guests a bit too well the other night, and when we had finished baking four pizzas on my new pizza stone (which produces wonderfully crusty crust!), folks were too full to consume more than a few bites of these rich bars. Which meant that I ended up eating most of them myself...and enjoying every bit of them.

I had purchased some dates for an appetizer a while back, but they turned out to be too dry to be good on their own, so I stored them in the fridge in some brandy and vanilla extract for a while. Not only did this rehydrate them and impart flavor that made them a tasty snack, but it also made them a flavorful component for baked goods. I baked them into granola, bread, and these bars, and find myself wishing there were some left to eat. You can, however, use any dates for this recipe, since it calls for making them into a sugary syrup before baking them, so don't bother to obtain the most expensive dates out there (save those for eating!).

Many thanks to my great-uncle's wife for this recipe! It is buttery, chewy, and crumbly all at once, and oh so sweet. I imagine you could sub out the date syrup with any kind of jam; really this recipe is just a good base for crumble bars, and easy to make out of ingredients you would normally find in your kitchen.


Date Crumble Bars

Preheat the oven to 350 degrees.

Date syrup:
2 C dates, cut up
1/2 C brown sugar
1 C water
1 tsp flour

Cook until thick. Set aside to cool and add 1 tsp vanilla.

Dough:
Blend the dough with a pie crust blender or fork:
1C flour
1 tsp baking soda
2 C oatmeal (one minute)
1 C brown sugar
3/4 C melted butter

Press a little more than half of the dough mixture into the bottom of a 9" x 13" pan. Pour the date syrup over the layer of dough. Sprinkle the rest of the crust mixture on top. Bake 20 minutes.

Note: Half recipe fits 8" round pan


Tuesday, November 15, 2011

Chocolate Peanut Butter


I feel like I'm always showing up in the kitchen at odd times and announcing to my roommate that I'm going to make something incongruous with the moment of the day. This week, it was "sorry for all the noise while you do calculus, I'm making peanut butter."

This chocolate peanut butter recipe has been on my mind probably for the past year, and since I don't usually have peanuts around, it remained in the background. Until, that is, I made this cabbage and lime salad with roasted peanuts and had lots of peanuts left over.


The recipe really is as simple as can be - buzz up the ingredients in the food processor, and it's done! It's just a matter of having the proper ingredients around.


Even my little food processor-blender attachment could handle this recipe, so even if you don't have the most powerful processor in the world, you can manage this butter if you have some kind of food processor (not sure if a blender would work).


This is similar to Nutella in that it is a nut/legume spread with chocolate in it, but as my mom says, "it's better" because it doesn't have the hazelnuts. I'm inclined to agree...I do like some Nutella from time to time, but I always wish I didn't have to taste the hazelnuts while I'm eating it. Problem solved with this peanut spread.

It's actually a spreadable version of my mom's chocolate peanut butter bars; it's got nearly all the same elements - peanuts, powdered sugar, oil/butter, chocolate/cocoa powder - without the crunch of graham cracker crumbs, and less sweet. Plus it doesn't need to be cooked, and can be eaten with breakfast!


Chocolate Peanut Butter

2 C shelled and skinned peanuts
1/2 C GOOD unsweetened cocoa powder
1 1/4 C powdered sugar*
1/4 tsp salt, plus more to taste
3 T peanut or canola oil

Heat the oven to 400 degrees. Spread the peanuts evenly on a baking sheet; if they are raw, roast them for 10 minutes, and if not raw, roast for 5 minutes, shaking the pan to move them around about halfway through either time period.

Transfer the peanuts directly to the food processor and grind them for about 5 minutes. They will first become a chunky paste, then smoother, then liquify. Scrape down the sides as needed.

Add the cocoa, sugar, salt, and 2 T of the oil and continue to process until blended well (about 1 minute). Add more salt if needed, and last tablespoon of oil if it is thicker than desired.

Store in refrigerator in a covered container.

*If you, like me, happen to be out of powdered sugar when you make this, and attempt to make your own powdered sugar in the food processor first, be aware that if you do not process the granulated sugar enough, the result will be a grainy peanut butter. Still tasty, but grainy.


Saturday, November 12, 2011

Spiced Pear Upside-Down Cake


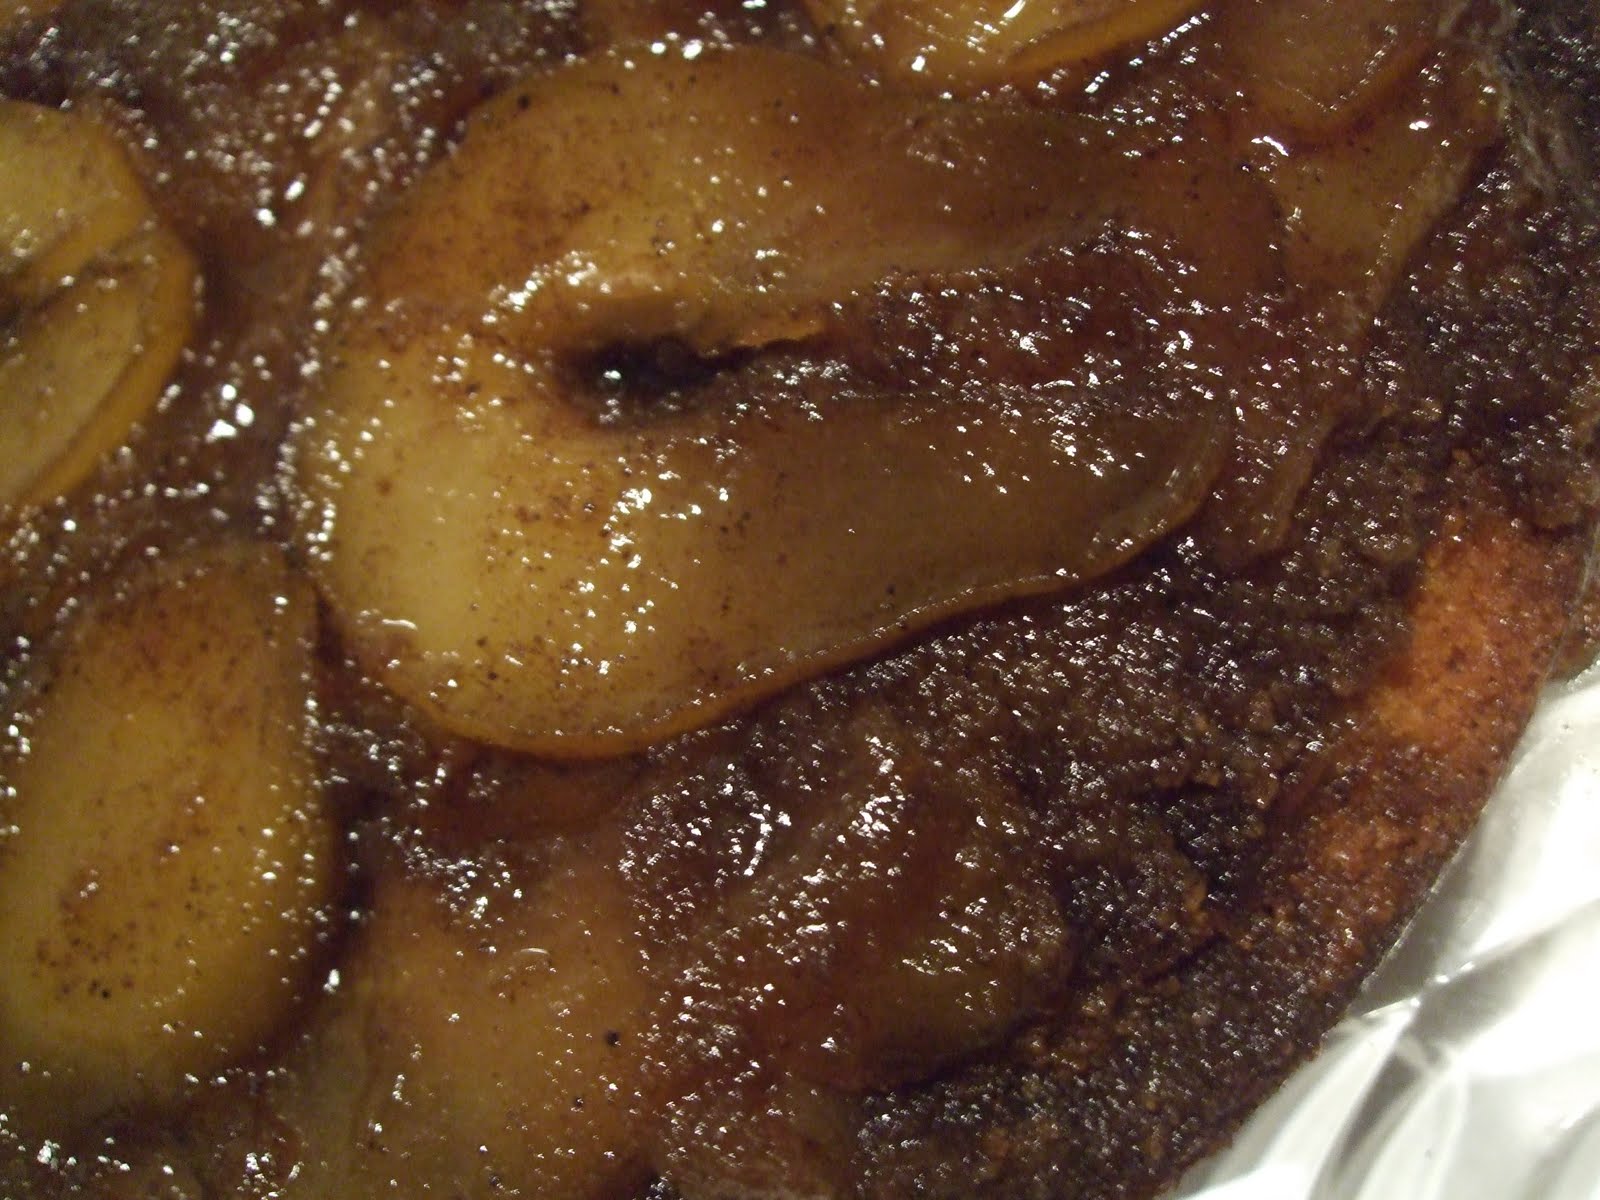
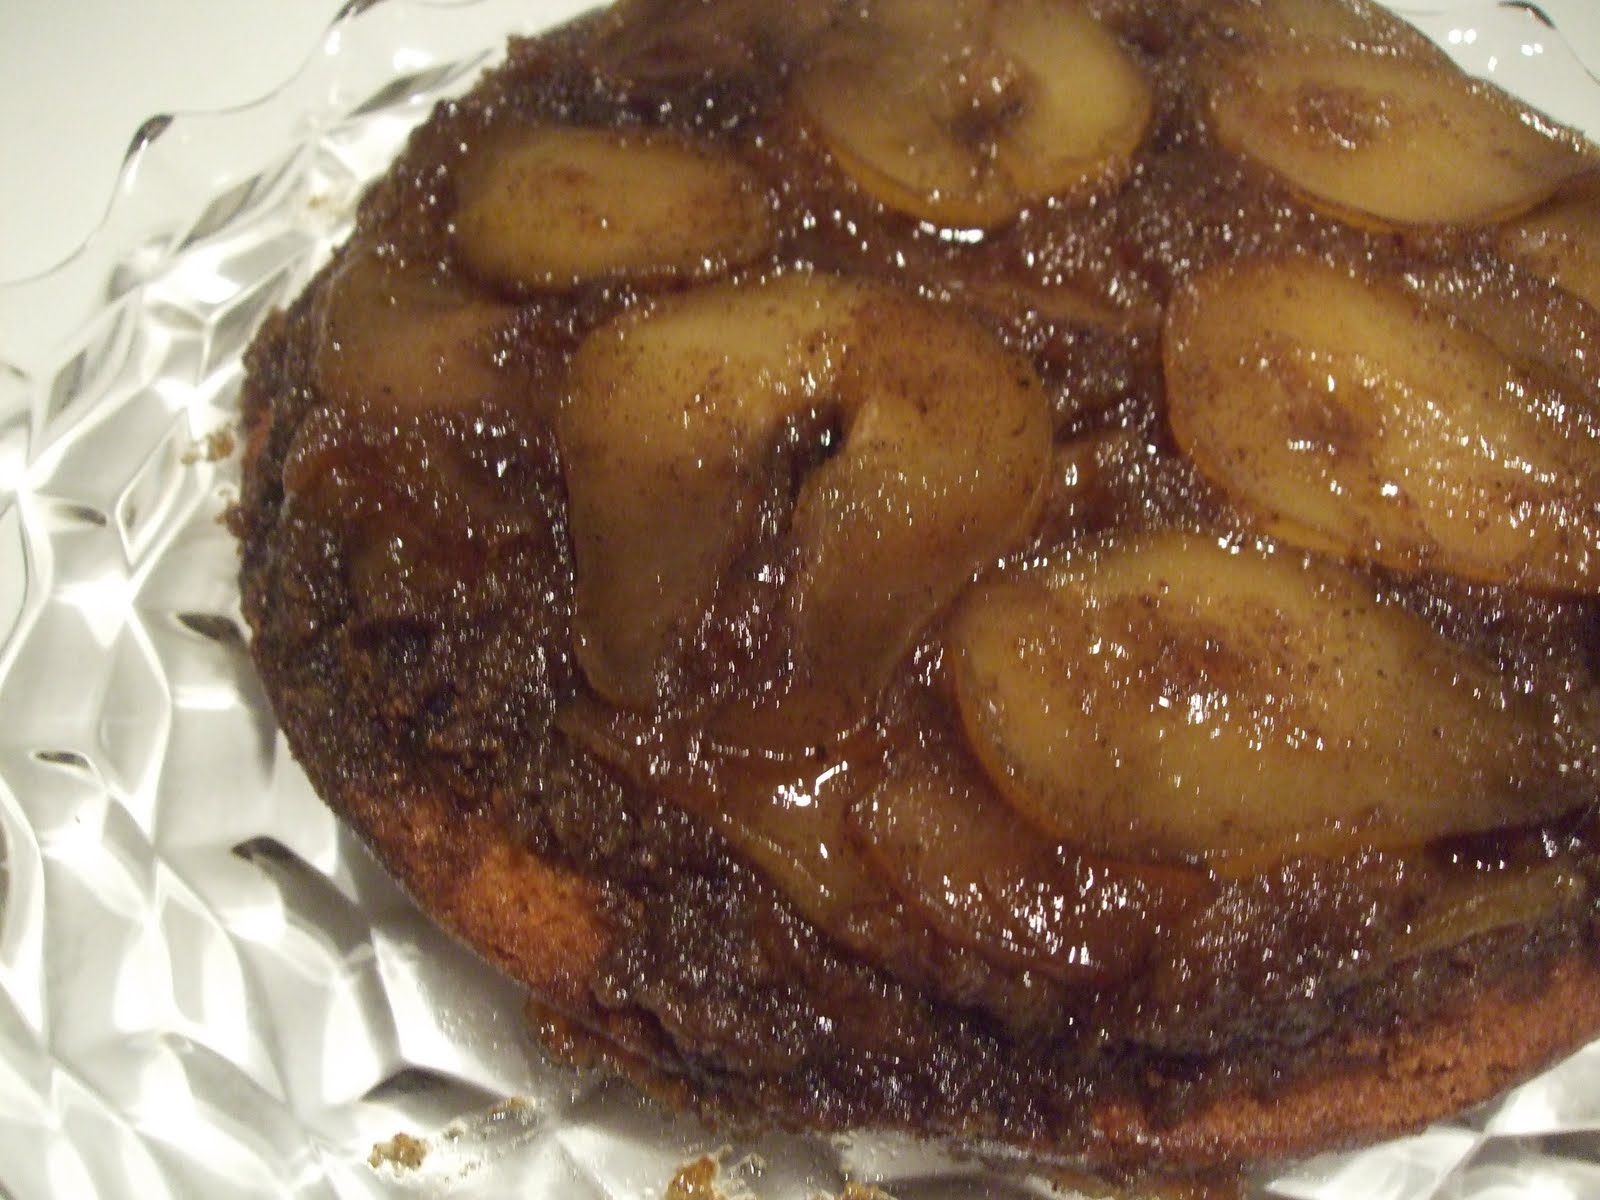
I love how this cake shines like the star that it is. It's a nice spin on the Tarte Tatin concept - caramel layer over fruit embedded in a buttery cake, baked upside down and flipped out of the pan onto a serving platter.

Add the fall spices and maple syrup, and the fact that it is an easily-executed success with good texture to the cake, and it's a winner in my book. I think apples could be substituted for the pears; I actually prefer this recipe to all the Tarte Tatins I've tried making thus far. While I continue my quest for a tasty but easy Tarte Tatin, this will work nicely.


Spiced Pear Upside Down Cake

12 T plus 5 T unsalted butter, plus more for greasing
2/3 C brown sugar
2 T maple syrup
2 ripe pears (Bartlett or Anjou preferred), peeled, halved, and cored
3/4 C plus 1 T granulated sugar
1 tsp ground cinnamon
1 tsp ground cardamom or nutmeg
1/4 tsp ground cloves
1 1/2 C flour
2 tsp baking powder
1 tsp salt
3/4 C milk
2 tsp vanilla
2 eggs


Preheat oven to 350 degrees. Butter a 9-inch round cake pan.

With a wooden spoon, vigorously beat the 5 T butter, brown sugar, and maple syrup in a mixing bowl until well blended. Spread the mixture over the bottom of the buttered cake pan.

Cut the pear halves into 1/4-inch slices and place in a bowl. Sprinkle with the 1 T granulated sugar, cinnamon, cardamom/nutmeg, and cloves and stir gently to coat. Arrange the pears in the bottom of the pan, fanning them and overlapping them slightly so the narrower ends point outward, and filling in the gaps with the smaller pieces (it never looks neat when I arrange fruit!).

Whisk together the flour, baking powder, and salt in a mixing bowl. Pour the milk and vanilla into a glass measuring cup.

In a stand mixer with the paddle attachment, beat the remaining 12 T butter and 3/4 C granulated sugar until fluffy. Beat in the eggs one at a time, scraping down the sides after each addition. With the speed on low, add the flour in 3 additions, adding half of the milk mixture between each flour addition. Increase the speed to medium-high and mix for 2 minutes.

Scrape the batter into the pan and spread evenly over the pears with a rubber spatula. Bake 60-70 minutes, until a toothpick comes out clean from the center.

Once finished baking, immediately loosen the sides of the cake from the pan with a butter knife. Place a large plate (at least 10 inches in diameter) upside down over the cake pan and carefully flip the cake out onto the plate, lifting the pan off the cake (shaking it if necessary to unstick it). Let cool for at least 30 minutes before serving.


Wednesday, November 9, 2011

Lemon Snowdrops


It may sound odd, but sometimes I forget that other people eat carbs. Living in L.A., I have become accustomed to folks turning down my baked goods because they just don't eat sugar, wheat, or any sort of refined carbs - not that this stops me from baking what I like!

I made these cookies after exploring sophistimom's lovely blog, and took them to my class at UCLA to give as prizes for a bingo game we played to review for the midterm (I mean, even I can't eat carbs ALL the time). The undergrads GOBBLED them up. And the few that were left were devoured by other grad students. Hmm, on second thought, maybe this carb-eating phenomenon is more a feature of the starving student lifestyle than a typical characteristic of the surrounding population...in any case, I was glad these cookies were enjoyed.

Personally, I enjoyed the buttery, sharply lemony goodness immensely - even in the uncooked dough, since there are no eggs in it! If you like lemon, and chewy cookies, you are going to LOVE these simple goodies.


Chewy Lemon Snowdrops

1 3/4 C flour
pinch salt
8 T (1 stick) unsalted butter
zest of 2 lemons
2/3 C sugar
1/4 C agave nectar or honey
1 tsp baking soda
2 T lemon juice
about 1 C powdered sugar, for coating

Preheat oven to 325 degrees. Line a baking sheet with parchment paper.

Whisk together flour and salt in a mixing bowl, and set aside.

In an electric mixer with a paddle attachment, cream together butter, lemon zest, sugar, and agave/honey. Beat until very smooth, about 3 minutes, then scrape down the sides.

In a small cup or bowl, combine the lemon juice and baking soda. With the mixer on low, add the lemon juice mixture and flour mixture. Scrape down the sides of the bowl with a rubber scraper and stir by hand a few times to make sure everything is incorporated.

Roll the dough into balls about one inch in diameter. Bake for 10-15 minutes (less for chewier cookies). Let cool for a few minutes on baking sheets, then roll each cookie in a bowl of powdered sugar to coat before they finish cooling.


Brown Butter Ginger Chews


It seems like brown butter is featured in every recipe that catches my eye these days. I've always been a fan, but I think I'm still realizing just how many flavors can be complimented by the nutty flavor of brown butter. It is especially wonderful in fall recipes with apples, pears, or spices. In these soft and chewy ginger cookies, the butter unfolds another dimension to the flavors, giving it a subtle complexity - that je ne sais quoi. And with a bit of sea salt on top, yum!


This was also the perfect way for me to put to use my new melon-ball sized scoop, which greatly simplified the process of forming the cookies. I'm always put off by a recipe if it involves rolling each cookie individually by hand, but with the scoop it was much quicker to portion out equal amounts of dough. Since I didn't roll each ball carefully to make them perfectly identical, they had a rougher finished quality to them, but they did maintain their height because of the scoop shape - which left them chewy.


Brown Butter Ginger Chews

Don't forget to leave time for this dough to chill in the freezer!

5 C flour*
4 tsp baking soda
2 tsp ground cinnamon
1 1/2 T ground ginger
1 tsp ground cloves
1/2 tsp salt
1 C butter, room temperature
1/2 C brown butter
2 C brown sugar
2 eggs
1/2 C + 1 T molasses
1 C chopped crystallized ginger (optional, plenty spicy without)
coarse sea salt to sprinkle on top

Brown the 1/2 C butter and set aside (see here for instructions with photos).
In a large bowl, combine the flour(s), baking soda, cinnamon, ginger, cloves, and salt.
In a separate mixing bowl, beat the butters and brown sugar until fluffy (it's okay if the brown butter is still a bit warm).
Stir the eggs and molasses into the butter and sugar mixture.
Add the dry ingredients into the wet in two additions, mixing until combined. Fold in the crystallized ginger if desired.
Let the dough rest, covered tightly in plastic wrap, in the freezer for 20-30 minutes (I ended up leaving it there for more like an hour, not a problem).

Preheat the oven to 375 degrees.
Take the dough out of the freezer and form it into 1 1/2-inch balls.
Place on baking sheets about 2 inches apart, slightly flattening the bottom so they don't roll (not necessary if you're using the leveled scoops of dough).
Press a few flakes of coarse sea salt on each ball of dough.
Bake for 9-12 minutes until firm (less time for more chewy cookies).

Makes about 5 dozen!

I bet these would be great for ice cream sandwiches...with caramel or cinnamon ice cream? Or butter pecan?

*I used 2 C whole wheat flour and 3 C all-purpose flour.


Thursday, July 21, 2011

Strawberry Banana Bread


I am super excited about this banana bread. Like super, super excited. Not only is it amazing banana bread, but you can actually taste the strawberries in it. I tend to find that "strawberry" baked goods either have a strongly artificial flavor (which I honestly don't mind sometimes, but it's not my fave) or don't have any strawberry flavor, regardless of whether you crush/macerate/purée/boil them down ahead of time. And I don't usually choose anything strawberry banana if I have a choice (strawberry banana yogurt? no thanks! the banana ruins it!). But this bread, this I choose.

In this bread, you simply add fresh diced strawberries to the batter, and you can taste them in the finished product. Voilà! Of course, your strawberry flavor will be as good as the flavor in your strawberries. The teeny berries I've got here in Berlin, which go bad quickly and don't even look that good in the store, actually have great flavor. They're tarter than the ones I buy in California, but they complement the sweetness of this bread so well. It makes me remember that buying cheap berries in Cali means that they often taste like water, and not much like strawberries (sorry Trader Joe's, on this one account you disappoint). So buy good, strongly flavored berries, and heck, buy a lot of them just to eat them - then if some start to get mushy, bruised, or moldy, you can cut off the bad parts and use the good parts to make this bread.


It helps that there are spices and Amaretto here to greatly adorn the strawberries and bananas, plus a topping of crusted sugar to keep it all happy. I love that I based this recipe on one called "jacked-up banana bread" on smittenkitchen's blog, and I jacked it up some more - replaced some of the bananas with strawberries, swapped the bourbon out for Amaretto, added more butter (accidentally doubled it the first time! darn european conversions), and slapped the sugar crust on top for good measure.

Only make this if you're ready to make your kitchen smell heavenly!


Strawberry Banana Bread

Preheat the oven to 350 degrees, and grease a loaf pan.

In a mixing bowl, place:

2 ripe bananas, smashed
1 C (approx.) diced strawberries

Stir in:
1/2 C (1 stick, ~100 g) salted butter, melted

Then add:
1 C (170 g) brown or raw sugar
1 egg
1 tsp vanilla
1 T Amaretto (or whatever you've got in the cabinet, except vodka, 'cause it's got no flavor)

And then:
1 tsp cinnamon
1/2 tsp nutmeg
pinch ground cloves

Sprinkle over mixture and stir in:
1 tsp baking soda
pinch salt

Then mix in until just combined:
1 1/2 C (180 g) flour

Pour into loaf pan. Bake for 45 minutes, then remove from oven. Generously sprinkle raw or white sugar over the top of the loaf, then wet the sugar down with Amaretto (as with this pine nut cake). Place back in the oven for another 5 minutes, or until a utensil comes out clean. Let cool in pan before serving.

Makes one loaf, and very few dirty dishes.


Yeah, I had to make two after I got a little too experimental the first time around; the cake was great, but I wanted to try to make frosting with quark, which rendered the bread soggy enough to be bread pudding. Which my British roommate liked, so she gets to finish it. For the rest of us, there is this new and improved crusty version.

P.S. It would be great without the sugar crust too, just eliminate that step and bake until a utensil comes out clean. If you like things a little less sweet, you can reduce the sugar in the bread to 3/4 of a cup also.

Wednesday, July 20, 2011

Peach Shortbread


I was debating whether or not to post this recipe, but after seeing my roommates hovering around the kitchen while my newest project came out of the oven with the comment, "that shortbread was amazing," I decided it should be shared (especially since a bit of experimentation just turned some fabulous strawberry banana bread into some kind of bread pudding...oops).

These pics are not the best in the world, but the brown butter in the recipe IS. This is the first recipe I've made that says to brown the butter, then let it solidify in the freezer before cutting it into the dough. That means that you can have the brown butter flavor AND the flakiness that results from cutting in solid butter, so it's definitely a technique I'll use again.

Peaches are one of the cheaper fruits out in Germany now, so I bought some and hunted through my favorite food blogs to decide how to use them. When I came upon this shortbread recipe, I was too impatient to wait for the peaches to ripen before I made them, so I just cut the peach slices realllly thin, macerated them with some sugar, and hoped the unripe flavor would not be evident. It actually worked!

These are not very sweet, but they are flaky, warmly spiced, and brown-buttery. Yes. And easy. They would definitely be good with any stone fruit, apple, or pear slices, but adjust the spices accordingly if you pick a fruit less amenable to cinnamon and nutmeg. The fruit is mostly to add color and texture, since the thin slices do not impart much flavor. The baking time would be longer for firm fruit like apples, so either cut them really thin, or take the risk that your dough will be done before the fruit is soft.


Here we go:

Peach Shortbread

1 C (200 g) sugar
1 tsp (5 g) baking powder
2 3/4 C plus 2 T (359 g) flour
1/4 tsp cinnamon
1/8 tsp nutmeg
1/4 tsp salt
1 C (227 g) unsalted butter
1 large egg
2 peaches, pitted and thinly sliced (1/8 to 1/4 thick; thinner means they turn translucent)

Brown the butter ahead of time in a small pot on the stovetop over medium-low heat. Let the butter melt, foam, turn clear golden, then a light brown color. Stir regularly during this process, scraping off anything stuck to the bottom. Before it browns, you will see steam come up from the surface, which is the water in the butter evaporating, and as it browns you will it smell it becoming a little nutty. As I learned in the cooking class I took in Paris last year, you can use all your senses to track the process of butter browning - seeing the steam rising, the color changing; hearing it foam, crackle, and settle back down; smelling the nutty scent of the final product; tasting and touching come later when it has cooled down! Just be sure not to burn it, which can happen quickly after it's become brown. I tend to under-brown it a bit out of fear of burning it, so the flavor of my butter is less strong than it could be.

Once the butter's browned, pour it into a heat and cold proof vessel and set it in the freezer until solid (about 30 minutes).

Preheat the oven to 375 degrees. Butter a 9x13 pan (I halved the recipe and used a 9-inch round pan, which made it very thin).

In a medium mixing bowl, whisk together the sugar, baking powder, flour, spices, and salt. With a pastry blender, fork, or your fingers, blend the brown butter and egg into the dry ingredients until it is crumbly but well mixed.

Pat 3/4 of the dough into the baking pan, pressing firmly. Lay the peach slices over the pressed dough in a single layer. Scatter the remaining crumbs of dough evenly over the peaches.

Bake for 30 minutes or until the top and edges are starting to brown. Cool completely in pan and then cut into squares.

Friday, July 8, 2011

Lemon Olive Oil Cake


Since I'm currently sharing an apartment in Berlin with six other people who frequently share food with each other, I've been trying to contribute baked goods to the kitchen from time to time. For Europeans, I like to bake simple desserts that aren't too sweet, which could serve as dessert, breakfast, or snack with tea or coffee. I started out with an almond cake, which went over well (and, incidentally, is gluten-free and incredibly easy), and then decided to work out a lemon cake. Lemon and olive oil being a proven flavor combination, I thought it would be nice to have an even quicker alternative to my lemon olive oil cupcakes.


I adapted this recipe from a French vanilla cake recipe; it's a simple, lightly sweet, and moist cake, with a touch of lemon to make it fresh. I replaced about a third of the melted butter with olive oil, added lemon zest and juice, and poured over some lemon glaze for a finishing touch. It formed a nicely browned crust in the metal loaf pan I used, so I'd highly recommend a metal pan if possible!


Lemon Olive Oil Cake
(so sorry, I don't have access to American measuring equipment here, so grams will have to do for now; use Chocolate and Zucchini's conversion page if necessary)

3 eggs
170 g sugar
zest of one lemon
160 g flour
1/2 T baking soda (about 1/2 European packet)
125 g butter
1/3 C olive oil
juice of 1/2 lemon

Preheat the oven to 350 degrees F/180 degrees C. Butter and flour a large loaf pan (i.e., rub butter along the sides and bottom of the pan, then pour about 1 T flour into the pan and shake it around to lightly coat each buttered surface, shaking the excess flour out into the sink or trash can).

In a mixing bowl, whisk together the eggs, sugar, and lemon zest until it becomes frothy and lightens in color. Pour in the flour and the baking soda and whisk it into the mixture as you pour.

Melt the butter in a small bowl, add the olive oil and the juice of half a lemon, and then stir the liquids into the rest of the mixture. Pour the entire mixture into the prepared loaf pan. Bake for 35-40 minutes; it's done when a knife or toothpick comes out clean.

Let cool.


Lemon Glaze

juice of 1 lemon
100-150 g powdered sugar

Place the juice in a small bowl. Stir in enough powdered sugar to thicken and sweeten the juice (it will still be a little runny, but the consistency is not super sensitive). Once the cake has cooled at least a bit, pour the glaze over the cake. Let it solidify, then serve!


Thursday, June 30, 2011

St. Louis Gooey Butter Cake


Wow, I can't believe I never posted this! I started a draft of this post more than a year ago, and here I am again.

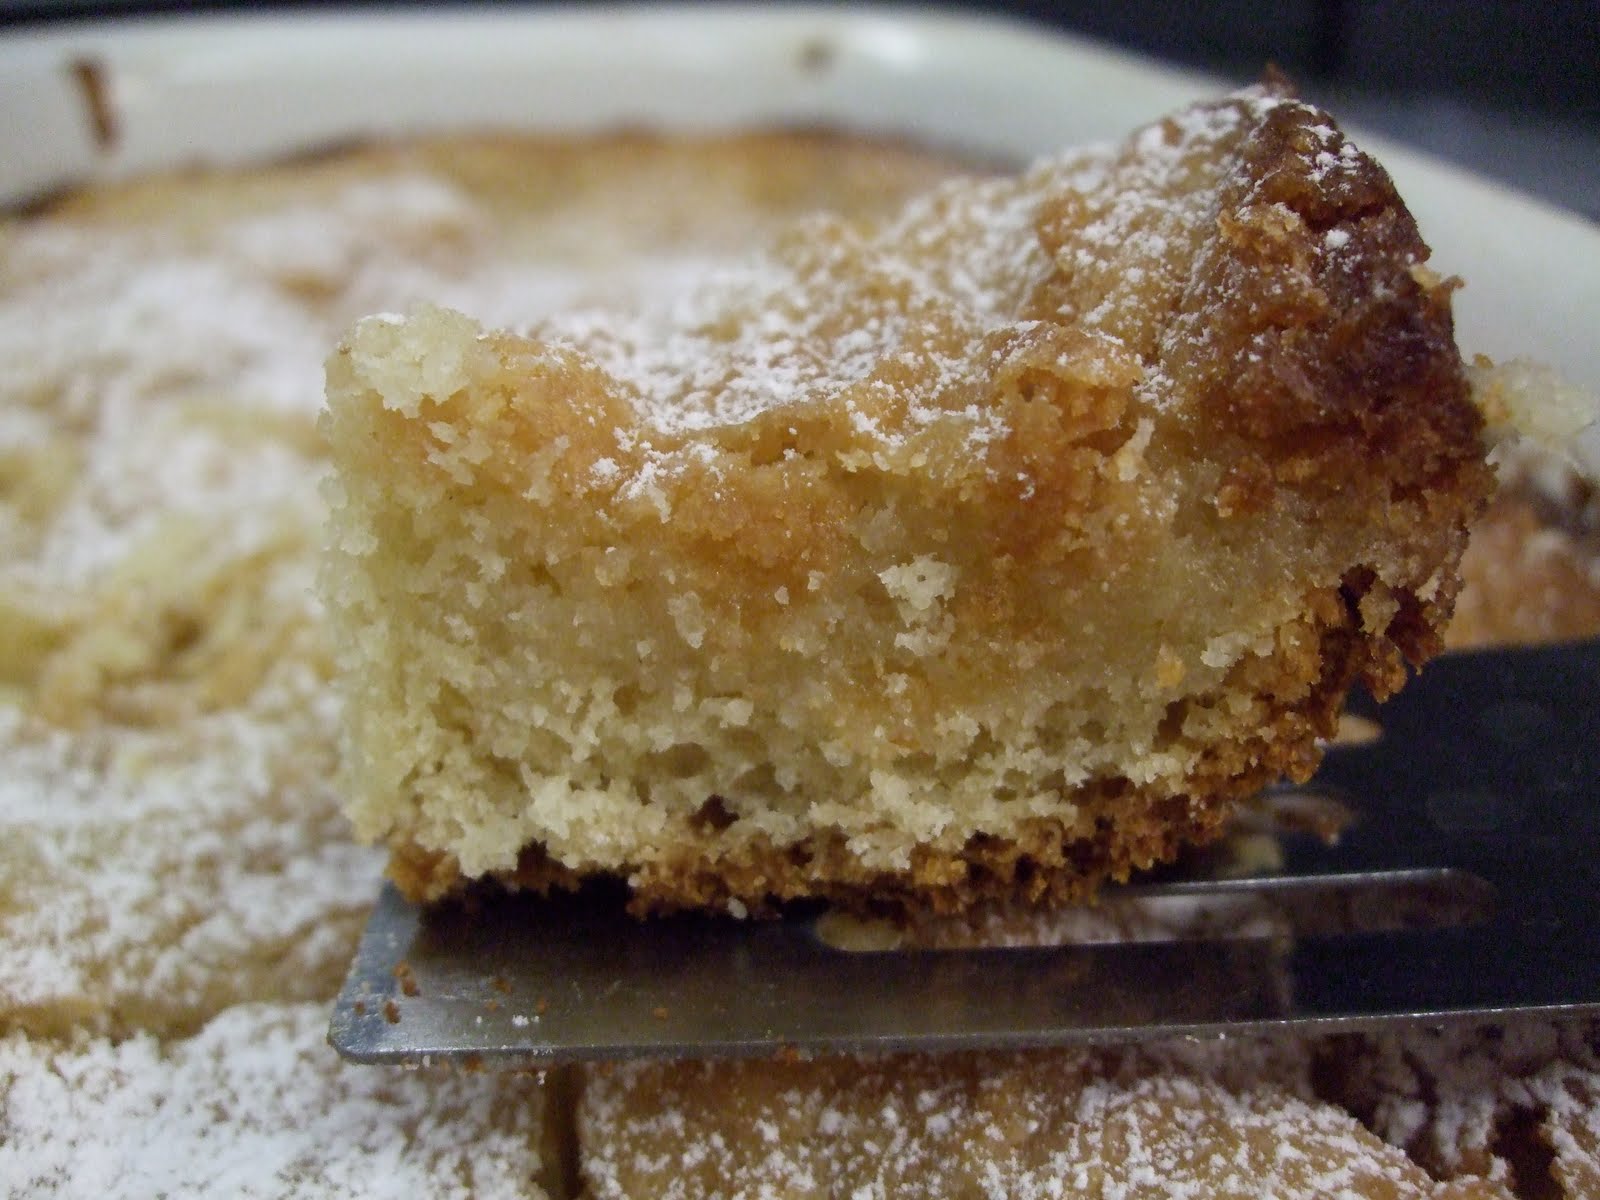
Despite the delay since I actually made this cake, it is absolutely worth posting. I still remember very clearly this unique and delightful cake, not too sweet and oh so buttery. There is something fascinating to me about a yeasted cake, with a slightly gooey topping that sort of seeps into the bottom cake layer. Like many of my favorite recipes, this one comes from smittenkitchen.

The layered cake concept also brings to mind a blueberry ricotta cake I recently made from King Arthur Flour, which is also a two-layered cake, but in this case tends towards a cheesecake consistency with an upper layer of a ricotta mixture (check it out since I didn't take any photos to make a post of it!). I am further reminded of this recipe for Lemon Cake Top Pudding, which ends up, well, with a cake-like top after you bake it, and pudding underneath - so interesting! Will make that one of these days.

In any case, I do not know why or how this comes from St. Louis, but I'm certainly glad it did! Whoever named it "gooey" and "butter" deserves a reward, because it is both of those things to everyone's delight.

See how the top layer gooeys into the bottom?? I take great pleasure in thinking of the word "gooey" as a verb - to gooey, gooeying, gooeyed. Why not? No other English word really has the same nuance.


Let's do this thing! Take care to save time for letting the dough rise, and make sure to not over bake it (see the instructions on baking pan choice). A stand mixer is necessary for the long periods of time that the dough gets beaten; a handheld electric mixer would not be hardy enough.

St. Louis Gooey Butter Cake

Cake ingredients:
3 T milk at room temperature
1 3/4 tsp active dry yeast
6 T unsalted butter at room temperature
3 T sugar
1 tsp kosher salt
1 large egg
1 3/4 C flour

Topping ingredients:
3 T plus 1 tsp light corn syrup
2 1/2 tsp vanilla extract
12 T (1 1/2 sticks) unsalted butter at room temperature
1 1/2 C sugar
1/2 tsp kosher salt
1 large egg
1 C plus 3 T flour

Powdered sugar for sprinkling

Preparing the cake dough:
Mix the milk with 2 T warm water in a small bowl. Gently whisk in the yeast until it dissolves. Mixture should foam slightly.

In a stand mixer with the paddle attachment, cream butter, sugar, and salt. Scrape down the sides of the bowl and beat in the egg. Alternately add the flour and the milk mixture, scraping down the sides of the bowl between each addition. Switch to a dough hook after everything has been added, and beat on medium speed until the dough has formed a smooth mass and pulled away from the sides of the bowl a little, 7-10 minutes (may still be very soft in the end).

Press, stretch, and nudge the dough into a greased 9x13 baking pan at least 2 inches deep; a metal cake pan will produce faster browning on the bottom of the cake, whereas a cake dish as I used (glass or ceramic) will produce less. If you use a metal pan, you will want to check the cake after 30 minutes of baking, rather than 45.

Cover dish with plastic wrap or a clean tea towel, place in a warm area, and allow to rise until doubled, 2 1/2 to 3 hours.

Preparing the gooey topping:
After the cake dough has risen, preheat the oven to 350 degrees. In a small bowl, whisk the corn syrup together with 2 T water and the vanilla extract. Using a stand mixer with paddle attachment or an electric mixer, cream butter, sugar, and salt until light and fluffy, 5-7 minutes. Scrape down the sides of the bowl and beat in the egg. Alternately add the flour and corn syrup mixture, scraping down the sides of the bowl after each addition.

Spoon the topping in large dollops over the risen cake and use an offset spatula to gently spread it in an even layer. Bake for 30 to 45 minutes (30 for metal pan, 45 for glass or ceramic dish); you may want to check it earlier than the prescribed time to ensure avoiding over baking. The cake will rise and fall in waves and have a golden brown top, but will still be liquid when done (I wished mine had been a little more liquid, but checked it too late).

Cool in pan, then sprinkle with powdered sugar before serving.


Friday, June 10, 2011

Whole Grain Blueberry Pecan Muffins with Ricotta Filling (Gluten-Free)


Here's the gluten-free muffins as promised - tender, moist, and flavorful. I am now a firm believer that gluten-free baking can work without gimmicks or difficult tricks, and be super tasty.

I relied on Gluten-Free Girl again to understand how to use the variety of gluten-free flours and starches that I've got in my cupboard. She's made gluten-free baking work without xanthan gum, or any other gum to provide binding in the baked goods, which is good news both for those who might be digestively sensitive to the gums or who would have a hard time finding them in the grocery stores.

Now that I've tried these, I fully believe what GFG says - gluten-free baking can produce lighter, better texture than gluten baking, because gluten can bind things up and weigh them down. That's why some recipes tell you not to over mix the batter - because the mixing action will create too much gluten and make a dense product.

You have a choice about the flours and starches you use in these muffins; GFG suggests keeping a supply of your own whole grain flour mix around, and provides a ratio of flour to starch (70/30) that you can use to create your own (I recommend reading her post linked above, it's much more thorough).

It is important to note that your baked goods will taste like the flours you choose; I was super curious about teff flour, so I mixed it with sweet sorghum and amaranth flours, with white rice flour as the starch and a few whole oats thrown in for texture. Teff turns out to have a fairly strong flavor (reminded me of a powdery buckwheat), so I would reduce the amount I would use of teff next time in proportion to the other flours, and probably choose another flour that does not have such a fine texture as the ones I chose. That being said, I still devoured four muffins as soon as they came out of the oven. Plus another one later - so, yeah, they turned out okay.

To make your own gluten-free flour mix, take 70% whole grain flours and mix with 30% starches.

Whole Grain Flours:
Almond
Amaranth
Brown Rice
Buckwheat
Corn
Millet
Oat
Quinoa
Sorghum
Sweet Brown Rice
Teff

Starches:
Arrowroot
Cornstarch
Potato Starch
Tapioca Flour
White Rice Flour


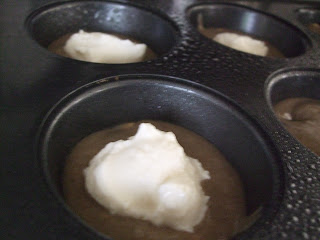
I also integrated a little advice from the Barefoot Contessa (incidentally, she is someone who I imagine never actually goes barefoot) who suggests greasing the tops of your muffin pans as well as the inside of the cups, to help you remove the muffins when they've cooled:


And I decided to make a ricotta filling for the muffins to use up some ricotta in the fridge, so I used the technique and amounts at this smittenkitchen recipe.

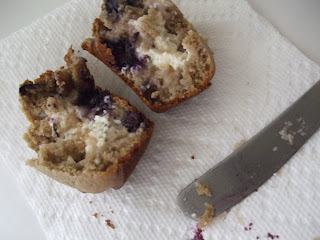
You can add any combination of nuts, dried or fresh fruits, or spices that you like - I went with frozen blueberries and pecans. The flavor of a lot of these flours is nutty, so the pecans were a good complement, and added nice texture.

It's possible to make the whole thing dairy-free too; just replace the buttermilk with almond or soy milk that you've curdled with 1 T apple cider vinegar, and eliminate the ricotta filling. GFG says that you can make them without eggs, but you'll have to see her instructions to see how to accomplish that.


Whole Grain Blueberry Pecan Muffins with Ricotta Filling
Gluten-Free

Preheat oven to 350 degrees. Grease a muffin pan or two (with filling, my batter made 17 muffins).

In a mixing bowl, whisk together to combine and aerate:

350 g whole-grain flour mix
1/2 tsp baking soda
1/4 tsp baking powder
180 g brown sugar
1 tsp kosher salt

In a separate bowl, whisk together:

2 eggs
1 1/4 C buttermilk*
1/3 C grapeseed oil

Use a rubber spatula to mix the wet ingredients into the dry. When they are almost fully combined, throw in any additions to you want (about a handful of chopped nuts and a handful of fruit will do; firm fruits may take longer to bake soft). Stir until all traces of flour are gone.

If you want the ricotta filling, combine:

1/2 C ricotta cheese (fat-free is fine)
6 T Greek yogurt or sour cream
pinch salt


Fill each muffin well 1/3 full with batter, plop 1 T of ricotta filling on the batter, then cover with more batter until the well is 3/4 full. The muffins will rise, but not like crazy, so you don't have to worry if the wells are close to full.

Bake about 25-35 minutes, until muffins are browned, the tops spring back to touch, and a knife comes out clean.


*Buttermilk may always be replaced by regular or soy/almond milk that has been curdled with apple cider vinegar. The proportion is 1 T vinegar to 1 C milk; just dump the vinegar in the milk before you set up the rest of your ingredients and pans, and it will be ready when you need it.


*** I'd like to note that the best whole grain combination I've come up with so far was a mix of cornmeal and almond meal for the whole grain flours, and corn starch for the starch. Great texture and taste!
Monday, June 6, 2011

Lemon Cornmeal Pancakes (Gluten-Free)


A generous friend recently gave me a whole box of gluten-free baking ingredients; while I am not gluten-free, baking alternatives always interest me. I feel like I've developed a sense of the necessary components of baked goods with gluten, so I've been reading gluten-free recipes for a while to get an idea of how they work. Most of the time, I am not excited enough about a recipe to buy the different flours, starches, and gums required of gluten-free baking, so I never have the exact ingredients necessary.

Now that I DO have the ingredients, however, the experimentation has begun. I read a bit of the theory on Gluten-Free Girl's blog, and explored recipes on websites including King Arthur Flour, which sells quality ingredients and has nice recipes. On the King Arthur site, this recipe for Lemon Cornmeal Pancakes caught my eye because they just sound bright and cheery - and that's exactly how they turned out! Lemon zest really is a magical ingredient, and is a happy complement to the slightly crunchy cornmeal.


The original recipe calls for potato starch, which I didn't have, so I subbed in tapioca flour/starch (understanding from Gluten-Free Girl that different starches generally serve the same chemical role in a given baked good). I used the melted butter option, since I love butter, but it may be made dairy-free as well by using olive or canola oil instead of butter, and almond or soy milk instead of the milk. I always enjoy the flavor combination of olive oil and lemon, but if olive oil disagrees with you or is too strong a flavor for you, canola may be a better choice. I did end up adding an extra tablespoon of milk to thin out the batter, and they turned out well.

These pancakes are an easy foray into the world of gluten-free goods because they use ingredients that are naturally gluten-free but not that hard to find, and the process of making them is not difficult. Cornmeal is used in Johnnycakes, so it is a time-tested pancake option, producing nice texture and mild flavor. I'm pretty sure my guest did not realize these were gluten-free, so that says something, right?

I'll be working on some whole grain gluten-free muffins later this week, so stay tuned!


Lemon Cornmeal Pancakes

In a mixing bowl, whisk together:

1/2 C potato starch or tapioca flour/starch
3/4 C cornmeal (whole grain or regular)
3 T sugar
1 1/2 tsp baking powder
1/2 tsp salt
3/8 tsp xanthan gum

In a separate bowl or measuring cup, beat together:

2 large eggs
3 T melted butter or vegetable oil
3/4 C milk
2 T grated lemon zest or 1/2 tsp lemon oil (I used the zest of two lemons)

Whisk the wet ingredients into the dry ingredients. The batter should be thinner than normal pancake batter, so if it's not add another tablespoon or two of milk to the batter.

Preheat a pan or griddle to medium-high heat; if you have an electric griddle set it to 350 degrees. Grease the pan or griddle.

Pour about 2 T of batter per pancake into the pan. Cook each pancake for 1-2 minutes, until the top is bubbly and the edges are dry, and then flip and cook for another minute or so on the other side.

Serve hot with maple syrup, agave syrup, berries, whatever suits your fancy.


Sunday, May 29, 2011

Honey Vanilla Marshmallow Fluff


Not to be fickle to my past loves, but I have just fallen in love anew. With yet another marshmallow-related treat. That is so, so easy to make - unlike those millions of batches of guimauves I've made in the last few years. Really, in the original recipe, the procedure lists ONE step. Amazing.

If you're a fan of good ole Kraft Marshmallow Fluff, you've got to try this. You could even make it all organic, with agave! It does take raw eggs, so if you are wary of that risk I'm afraid I don't have another option for you yet (haven't tried powdered eggs whites at this time).
All you have to do is throw the ingredients into a bowl and whip them up with an electric mixer, and voilà! Light, fluffy, sweet goo with a hint of honey and a touch of vanilla. Wonderful swirled into ice cream or on top of it; great in peanut butter sandwiches; delightful swiped off the side of the mixer bowl. I'm thinking this will make a yummy gift as well, especially since my collection of glass jars to reuse is starting to fill up their drawer. And this makes a huge amount that I could (well, should) never finish by myself in the 3 weeks it stays good.

Making this reminded me of this episode of The Best Thing I Ever Ate, in which Duff and the folks of Charm City Cakes get a crazy-looking ice cream sundae called the "CMP" at Woodberry Kitchen in Baltimore, MD. CMP = Chocolate, Marshmallow, & Peanuts. Peanuts steeped in sugar syrup dumped over three scoops of vanilla ice cream, topped with organic ganache and marshmallow fluff, sealed into a glass with a disk of cooked hard crack sugar (seriously, blow torched around the edges of the glass!). As soon as I got just a little glimpse of that sundae, I coveted it with a passion. This is me, still thinking about that one minute clip of a TV show 6 months later. So making this fluff was the perfect opportunity to make my own version of CMP. I don't keep peanuts around, but I boiled some pecans in simple syrup, threw them on a scoop of my homemade coconut ice cream, topped it with some bittersweet ganache, and then a pile of this fluff. CMP = OMG. The bittersweet chocolate with the sweet fluff was perfect.


The fluff turned out very sweet for me, so the recipe below includes a tad less agave than I used. If agave is too strong of a flavor for you, you may replace some of it with light corn syrup, or swap it all out for one cup of corn syrup.


Honey Vanilla Marshmallow Fluff
based on this recipe, referral thanks to my friend at Movies and Munchies

2 large egg whites
3/4 C agave syrup
1/4 C honey
pinch salt
1 C confectioner's sugar
2 tsp pure vanilla extract

Place the egg whites, agave, honey, and salt in a mixing bowl or the bowl of your stand mixer. Use an electric hand mixer or a whip attachment for your stand mixer to whip the ingredients on medium high speed for 5 minutes, until the ingredients have doubled in volume and look pale and thick. Slowly beat in the sugar, then mix in the vanilla.

Store fluff in an airtight container in the refrigerator for up to 3 weeks. Lick the bowl so that none gets wasted.