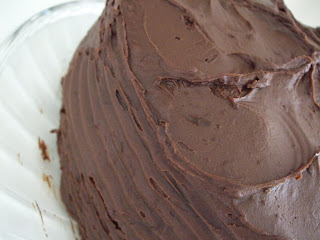
Showing posts with label ganache. Show all posts

Monday, February 7, 2011

Chocolate Caramel Tart


This tart is not a fancy looker, but it is extravagantly rich and chocolatey. The short crust is not overly sweet, balancing the chocolate ganache* filling along with the salted caramel layer hidden underneath.

I would also characterize this dessert as simple and easy to prepare ahead of time - both good things in my book. You'll need to plan ahead to make of the three layers, since the crust, caramel, and chocolate ganache each need to set and cool before the subsequent layer can be added. There is more time necessary for cooling than for actual preparation. I've yet to master the art of making pie crust - and am unlikely to do so since I'm not super into pies - so a tart like this is an easy way of achieving something similar, but more to my taste.

I took it to an engagement party as the chocolate component of a trio of desserts (with a pistachio cake and a lemon parfait of cream and sponge cake, to be posted soon). In my opinion, providing sweets for an event involves trying to make as many people happy as possible, and that means knowing your audience and finding a variety that will appeal to them. For this event, I knew the attendees did not prefer overly sweet desserts, so I looked for less sweet options that were in different media (cake, tart, and creamy) and different taste profiles (nut, chocolate, and lemon). And to keep me happy, options that would be interesting but easy to make!

The tart crust may be used with a wide variety of fillings - glazed fresh berries, baked custard with fruits, nutty creams - you just want to bake the shell ahead of time and then add the filling, to be baked or served fresh.

Chocolate Caramel Tart

Short Pastry (Pâte Sablée)
  • 1/3 C plus sugar (unrefined or white)
  • 1 C plus 2 T flour
  • 7 T butter (salted, or unsalted plus a pinch of salt)
  • 1-2 T ice-cold water or milk

Preheat the oven to 350°F. Grease a 10-inch tart pan with butter and set aside.

Prepare the pâte sablée. In the bowl of a mixer or blender, combine the sugar and flour. Add the butter and process in short pulses until the mixture resembles coarse meal. (Alternatively, rub the butter into the dry ingredients by hand with the tips of your fingers or a wire pastry blender.) Add a tablespoon of water or milk and mix again, in short pulses, until it is absorbed. The dough should still be crumbly, but it should clump if you gently squeeze a handful in your hand. If it doesn't, add a little more water -- teaspoon by teaspoon -- and give the dough a few more pulses until it reaches the desired consistency.

Pour the mixture evenly into the prepared tart pan. Using the heels of your hands and your fingers, press on the dough gently to form a thin layer, covering the surface of the pan and creating a rim all around. Don't worry if the dough feels a little dry, this is normal. Cover with plastic wrap and refrigerate for 30 minutes, or up to one day.

Bake for 20-25 minutes, until golden, keeping an eye on it. Transfer to a rack to cool.

Salted Caramel Filling (optional)

  • 1/2 C light brown sugar
  • 1 T honey
  • 1/2 tsp fleur de sel or kosher salt
  • 1/3 C crème fraîche or heavy cream**
  • 2 T unsalted butter, diced

Once the tart crust is cooled, prepare the caramel filling. Make sure you have all the ingredients measured out before you start. Combine the brown sugar and 1 T water in a small heavy-bottomed saucepan and melt the sugar slowly over medium-low heat. Swish the pan around from time to time to ensure even melting, but don't stir. As soon as bubbles form on the surface (avoid overcooking the caramel, which would result in a bitter taste afterward), add the honey and stir to combine. Add the salt and cream and stir until blended. Remove from heat, add the butter, and stir to combine. Pour the caramel into the tart shell and tilt the pan slowly in a circular motion to coat the bottom of the shell evenly. Let set in the fridge for 40 minutes.

Chocolate Ganache Filling

  • 10 oz. good-quality bittersweet chocolate, finely chopped**
  • 1 C crème fraîche or heavy cream

Once the caramel is cooled, prepare the ganache filling. Put the chocolate in a medium mixing bowl, preferably stainless steel. Bring the cream to a simmer in a heavy-bottomed saucepan over medium-low heat (turn off the heat just after you've seen bubbles appear around the edge of the surface of the cream). Pour half of the cream on the chocolate (cover the rest), let stand for 20 seconds, and stir gently in the center with a whisk, gradually blending the cream with the chocolate until smooth. Add half of the remaining cream, and stir again until combined. Repeat with the remaining cream. Remove the tart pan from the fridge, pour the chocolate filling into the shell, and level the surface with a spatula, covering all of the caramel layer and spreading the ganache to the edges of the shell. Return to the fridge to set for an hour.

Remove the tart from the fridge 15 minutes before serving. Cut in small slices, and serve on its own or with fresh berries. The leftovers will keep for several days, tightly wrapped and refrigerated.


*Ganache is a smooth and creamy combination of chocolate and cream, similar to what you might find in the middle of a See's Candy chocolate. This recipe details one of several approaches to its preparation, but it is always a simple method.

**The price of butter and heavy cream at Smart and Final is regularly excellent, as is Costco if you have a membership. Trader Joe's is a slightly more expensive option, but still cheaper than most regular grocery stores.

***I like Trader Joe's Pound Plus for an affordable option, which is available in milk, bittersweet, and dark.

Sunday, November 8, 2009

Hazelnut White Chocolate Truffles


This is a recipe that I sort of ended up making by accident; I initially saw this list of candy recipes on Epicurious.com and wanted to make the Brown Sugar-Pecan Balls (still do!), but the truffle recipe was slightly simpler and fit better into the limited time that I had. The truffles started out as Coconut Macadamia Truffles, but I swapped in hazelnut for the macadamia due to the contents of my freezer, and brandy for the rum ('cause I've always got brandy around...), and suddenly the flavor was hijacked by the nuts and a hint of brandy bitterness.

These are great if you need a sweet treat that takes very little prep time, and can be made ahead - you just need to allow for the 4 hours setting time and time to roll them into balls prior to serving. Definitely a good holiday candy!


Hazelnut White Chocolate Truffles

8 oz. white chocolate chips
1 C (5 oz.) dry salted roasted hazelnuts
1/4 C heavy cream
2 T brandy (omit or reduce to 1 T if you aren't a fan)
1 1/2 C finely shredded unsweetened desiccated coconut

Finely grind white chocolate in a food processor and transfer to a bowl. Pulse nuts in food processor until finely ground (be careful not to grind to a paste).

Bring cream to a simmer in a medium skillet. Remove from heat and stir in brandy. Whisk in white chocolate until melted and ganache is smooth. Stir in nuts. Pour ganache into a plastic-wrap–lined 8-inch square baking pan and chill, uncovered, until firm, about 4 hours or overnight.

Invert ganache onto a work surface and remove plastic wrap. Cut ganache into 64 squares and roll each piece between your palms to form a ball. When all balls are formed, roll in coconut to cover completely, then chill truffles, covered, until ready to serve.

Thursday, October 8, 2009

Chocolate Stout Cake, aka Baking with Guinness


What better way to include others than chocolate cake? Oktoberfest concluded this week, which means that you all will probably have some leftover beer sitting around...and even if not, why not make a cake loaded with stout (read: Guinness-like beer!), coffee, and dark chocolate? This is a nice dark cake, not too sweet, with a rich ganache icing - and I've been told it gets better over time (it didn't last long enough in my house for me to taste it on day 2). If you don't overwhip the egg whites like I did this last time, the cake should end up light and moist. The Guinness also lends a subtle yeastiness to the cake, a quality I appreciate when using it in this beer bread.


So here you go! Enjoy the remainder of the stout left in the can or bottle after you apportion some for the recipe:

Chocolate Stout Cake
from Bon Appétit (see original recipe for notes on beer)

3
ounces unsweetened chocolate, chopped
2 1/4
cups all purpose flour
2
teaspoons baking powder
1/2
teaspoon baking soda
1/2
teaspoon salt
14
tablespoons (1 3/4 sticks) salted butter, room temperature
1 1/4
cups plus 3 tablespoons sugar
3
large eggs, separated
3/4
cup chocolate stout, regular stout, or porter
2/3
cup freshly brewed strong coffee

Preheat the oven to 350 degrees. Butter and flour two 9-inch cake pans, line each with parchment paper on the bottom inside, and set aside.

Melt chopped chocolate in a double boiler and remove from heat.

In a medium mixing bowl, whisk together flour, baking powder, baking soda, and salt.

In a large bowl, use an electric mixer to beat butter and 1 1/4 C sugar together until light and fluffy (about 2 minute). Beat in egg yolks one at a time. Add melted chocolate, then stout, then coffee. Beat in flour mixture in two additions until just incorporated.

With clean dry beaters, whip egg whites and remaining 3 T sugar until stiff but not dry. Then fold 1/3 of whites into the cake batter, then the remaining whites in 2 additions.

Divide the batter into the prepared pans and smooth the top of each with a rubber scraper.

Bake about 30 minutes until a toothpick comes out clean. Let cool in pans on a rack for 20 minutes, then run a knife around the edge of each layer and turn out onto racks to cool completely.

Ganache Icing
1 pound bittersweet chocolate (54% to 60% cacao), chopped
2 cups heavy whipping cream
1 teaspoon instant espresso powder


Place chopped chocolate in medium heatproof bowl. Combine whipping cream and espresso powder in medium saucepan. Bring cream mixture to simmer over medium-high heat, whisking occasionally.

Pour cream mixture over chopped chocolate; let stand 1 minute, then whisk until chocolate is melted and mixture is smooth (try to whisk without incorporating air bubbles). Chill chocolate frosting until slightly thickened and spreadable, stirring occasionally, about 2 hours (or for quick chilling, place frosting in freezer until thickened and spreadable, stirring occasionally, about 30 minutes).

Using serrated knife, trim rounded tops from both cake layers so that tops are flat (optional). Place 1 cake layer, trimmed side up, on 9-inch-diameter tart pan bottom or cardboard round, then place on rack set over baking sheet. Drop 1 1/4 cups frosting by large spoonfuls over top of cake layer; spread frosting evenly to edges with offset spatula or butter knife. Top with second cake layer, trimmed side down. Spread remaining frosting evenly over top and sides of cake.

DO AHEAD Can be made up to 1 day ahead. Cover with cake dome and refrigerate. Let cake stand at room temperature at least 1 hour and up to 3 hours before serving.


Sunday, May 10, 2009

Chocolate Mascarpone Cupcakes Dipped in Ganache


Oh, cupcakes. And ganache. How well they pair.

In my search for good homemade cake recipes, I stumbled upon this Everyday Italian recipe before it was yanked from Hulu, and I'm so glad I did! The cake itself has mascarpone cheese in it, and it ends up moist, nicely textured, VERY chocolaty, and not too sweet. This was not the most smooth ganache that I've ever made since I sort of forgot to stir it for a while after I had poured the cream over the chocolate, but still, the dipping process went well. I think they would look really pretty with a sugared violet on top of each one, so maybe that will be the plan next time!

Chocolate Mascarpone Cupcakes

5 oz. chopped unsweetened chocolate
1/3 C mascarpone cheese
3 C flour
1/2 tsp baking powder
1 tsp baking soda
1 tsp salt
3/4 C chocolate chips
2 1/4 C sugar
1 T vanilla
1 C vegetable oil
3 eggs

Preheat the oven to 325 degrees. Boil 1 C water in a small saucepan, and once it boils stir in the chopped unsweetened chocolate and turn off the heat. Off the heat, add the mascarpone cheese and set aside to cool.

Mix the dry ingredients in a separate bowl: flour, baking powder, baking soda, salt, and chocolate chips. Adding the chocolate chips at this point will allow them to be coated in flour, which will help them to be suspended in the batter.

Use a handmixer to beat the wet ingredients in a new bowl: sugar, vanilla, oil, and eggs. Add the cooled chocolate to the wet ingredients and mix well with mixer. Add the dry ingredients to the wet in a few batches, stirring each batch just enough to mix it in without over mixing.

Line a muffin pan with cupcake liners; recipe makes about 33 cupcakes. Bake the pans one at a time in the oven for 20-25 minutes until a toothpick comes out clean.

Bittersweet Ganache

2/3 C heavy cream
1/2 tsp vanilla
1 C bittersweet chocolate chips

Heat the cream until bubbles form around the edge of the saucepan. Remove from heat and stir in the vanilla. Pour the heated cream over the chocolate chips in a bowl. Stir gently until the chocolate has melted and well incorporated with the cream. Let sit and thicken until cool. Dip the cooled cupcakes and serve!

Thursday, May 7, 2009

Flourless Chocolate Cookies à la Caramelized White Chocolate


I told you I would blog more about Caramelized White Chocolate! The day after I finished off my first batch of the ganache, well, I made another. I couldn't help it...and I have to say that I was quite satisfied with this use. Satisfied enough to post a photo of these silly things in the freezer bag that is supposed to protect them from me long enough to make it to my family's mouths this weekend...if I publish this online right now, I really do have to save them as promised...

This cookie recipe caught my eye last month on the Desserts Magazine site; I believe my cookies did not end up flat as theirs did because mine got overmixed. That's what happens when you follow time instructions rather than your gut. But these turned out well all the same, and perhaps chewier as a result of the mixing (although the photo on their website could be misleading, as the instructions say they should end up no more than half an inch thick, which is much thicker than the one in the photo, so maybe I just made mine too small). Super chocolatey, packed full of nuts, easy to make, and fabulously paired with caramelized white chocolate ganache and a touch of sea salt in the middle, yum! Glad I made the cookies smaller than directed since I made them into these rich sandwiches.

The white chocolate caramelizing went a bit different this time; the white chocolate chips did in fact liquify initially when roasted in the oven, but this did not affect the outcome. I just kept up the stirring, and it still turned nicely brown and crumbly, and worked equally well in the ganache. Which reminds me that it's a good idea to try a recipe more than once when posting it (as per these food blog ethics guidelines...), which I generally try to do - and I don't usually post something unless I'd make it again.

So here's one more thing I would definitely make again (maybe with almonds next time?):

Flourless Chocolate Cookies

1/2 cup + 3 tablespoons (68g) Dutch-processed cocoa powder (high quality for best chocolatiness!)
3 cups (350g) confectioners’ sugar
Pinch of Salt
2 3/4 C (272g) walnuts, toasted and coarsely chopped
4 large egg whites, at room temperature
1 Tablespoon (15g) pure vanilla extract

optional for more chocolatiness: 1 C bittersweet chocolate chunks

1. Place a rack each in the upper and bottom thirds of the oven and preheat the oven to 350 degrees F. Line two baking sheets with parchment paper or silicone baking mats.

2. Combine the cocoa powder, confectioners’ sugar, salt, and walnuts (and chocolate chunks, if using) in the bowl of an electric mixer fitted with the paddle attachment. Mix on low speed for 1 minute. With the mixer running, slowly add the egg whites and vanilla. Mix on medium speed mix for 3 minutes (or less!), until the mixture has slightly thickened. Do not overmix it, or the egg whites will thicken too much.

3. With a 2-ounce cookie or ice-cream scoop or a generous tablespoon, scoop the batter onto the prepared baking sheets, to make cookies that are 4 inches in diameter, Scoop 5 cookies on each pan, about 3 inches apart so that they don’t stick when they spread. If you have extra batter wait until the first batch of cookies is baked before scooping the next batch.

4. Put the cookies in the oven, and immediately lower the temperature to 320 degrees F. Bake for 14 to 16 minutes, or until small thin cracks appear on the surface of the cookies. Switch the pans halfway through baking. Pull the parchment paper with the cookies onto a wire cooling rack, and let cool completely before removing the cookies from the paper. Store in an airtight container for up to 2 days.

5. Sandwich the completely cooled cookies with the ganache of your choice and a light sprinkling of sea salt in the middle, and refrigerate to assist the bonding process. If the cookies are not completely cooled they will melt the ganache.


Really, don't forget to pair the caramelized white chocolate ganache with salt, no matter what you do with it!

Saturday, May 2, 2009

Caramelized White Chocolate, Oh My!


This recipe was one of the things I saw on a food blog and thought immediately "I HAVE to make that!" David Lebovitz mentioned it briefly in his post about the Valrhona chocolate school, and the mere suggestion of caramelizing white chocolate intrigued me. Until this year I haven't been a big fan of white chocolate, but all of a sudden it has started to taste good to me - and I also LOVE all things caramel.

When I googled "caramelized white chocolate" and discovered that it tastes something like browned butter frosting and butterscotch, that sealed the deal for me. And it's easy to make, to boot! This website, The Chocolate Life, gave simple instructions that I put to the test, to fabulous results. My apartment filled with an amazing smell almost immediately, and I quickly found myself making a ganache and dreaming up ways to serve it (macaron filling? cupcake topping? cookie frosting? something with fleur de sel? never mind the fact that I scooped most of it into my mouth with my fingers...). I was already bemoaning the fact that Trader Joe's has discontinued their white chocolate chips, but now I'm practically in mourning. I may start buying them whenever I find them, since I'm finding them to be increasingly scarce.


Caramelized White Chocolate

12 oz. white chocolate chips
for the ganache:
1/2 C heavy cream (increase for a thinner ganache)
1 T unsalted butter

Preheat the oven to 250 degrees. Spread 12 oz. white chocolate chips (or more!) in a roasting pan and place in the oven. Stir every 8-10 minutes, for an average of 25-35 minutes in the oven. Be careful not to burn them (I often take them out of the oven at 25 minutes after stirring every 8 minutes). They will start out looking as pictured above - crumbling slightly and browned. They should liquify eventually. The time for this process varies greatly with different sizes and brands of white chocolate chips, so allow enough time for this to take more than an hour if you're trying a brand for the first time.

To make into a ganache, heat 1/2 C of heavy cream in a small saucepan until bubbles form around the sides of the pan. Then pour over the chocolate chips and stir smoothly until all the candy is melted, or process together in a food processor (keep the processor with the chocolate in it running while you pour the heated cream into it in a constant stream). Stir in/process 1 tablespoon unsalted butter. Let cool; whip with an electric mixer when cooled if you want a lighter whipped ganache. Makes approximately 1 1/2 C ganache.

If you don't want to make this into a ganache, well, get creative! I'm considering sprinkling them on top of, or maybe inside of, cupcakes...but the crumbly nature of the roasted chips makes them a little difficult unless they are mixed while warm with warm cream into the smooth ganache, or perhaps they would work in a buttercream frosting. It's certainly worth the time to explore the options for this wonderfully rich dessert flavor! I will be sure to post on caramelized white chocolate again and again.

Wednesday, April 22, 2009

Chocolate Macaron Success!


Finally, finally, on my fifth attempt and third recipe, I found success in the macaron world. Leave it to Macaron God Pierre Hermé to set me right! Not only are these feet just right, but the texture is a wonderful balance of chewiness and lightness, the tops formed a nice shiny crust, and the ganache is the smooth happiness in the middle.

Of course, now that I re-look at photos from my Paris trip last year I can recall exactly how perfect PH's macarons were, much finer in texture than mine, and lighter. But still, as progression from my previous attempts AND in comparison to the MANY disappointing American macaron imposters I've tried (Boule? Paulette? most of San Francisco?), these were quite a success. I even got a real Frenchman to try them, and his approval (as a wealthy Parisian well acquainted with Pierre Hermé) should serve as objective proof that these are the real deal!


One of you lovely readers actually brought this successful recipe to my attention; to be fair, this is a recipe based on PH's own, but I give him all the credit for the unique components of it. I believe that it was these unique techniques that set this recipe apart from recipe #1 and recipe #2:

1. The egg whites are measured by volume rather than by egg (1/2 C, instead of 4 eggs), giving it more accuracy.
2. The egg whites are warmed carefully in the microwave, and the mixing bowl warmed under warm running water, in order to keep the temperature of the egg whites high enough to boost their volumizing potential. Good instructions are also given about how to know when the whites are whipped enough.
3. Granulated sugar is NOT added to the whipping egg whites.
4. The piped cookies sit on the baking sheets for 15 minutes before going into the oven in order to form the sheen on the domes.
5. The oven is heated to 425 degrees, and then dropped to 350 upon placing the baking sheet in the oven by propping the oven door open with a wooden spoon (which may also help keep the humidity of the oven lower).

The ganache recipe is great, but makes twice as much as necessary to fill one recipe of these macarons, so you can halve it if you want to make the exact amount.

So, this recipe gets my vote as the best chocolate macaron recipe, both in outcomes and in thoroughness of instruction. I've made it twice now, to entirely consistent results (if only I hadn't been out of parchment paper the second time, that is - NEVER make these without parchment paper unless you want broken-top macarons!). Next time I will make sure to grind and sift the almond powder better in order to produce a finer texture, or perhaps grind blanched almonds rather than starting with Trader Joe's almond meal.

Now to find good recipes for other macaron flavors! I am scared to upset the dry ingredient balance by removing the cocoa powder...if only amazon.fr would e-mail me to say that PH's Macaron book is ready to ship to me!

Thursday, February 26, 2009

Dessert Sushi: A Concept in Process

I have decided to share this work-in-progress with you. Of course, this food has been made and eaten already, but the concept is not finished in my mind.

I've been thinking about the idea of dessert sushi for months, ever since I discovered that I could cut out my marshmallows into shapes and build things with them. Since the marshmallow is so versatile, I thought that I could make dessert sushi in the manner of California rolls, with the marshmallow serving as the "rice" on the outside, and all sorts of nice things to fill it up: ganache, salted caramel, nuts, fruit, coconut - you get the idea. And why not dust the outside with nice things as well to replace the sesame seeds?

So here's how it went this time:


I made the marshmallow in a thin layer and let it sit for a day, having dusted the initially sticky top side with roasted nuts and chocolate shavings. The next day, I cut it into sections that I estimated would roll into the right size, and started laying down the fillings. Pictured above is a layer of ganache on the marshmallow, with dried raspberries (rehydrated a tad) down the middle.


I had been concerned that the individual rolls would not hold together, but the marshmallow amazed me: it not only stretched around the fillings, it also stuck to itself when pinched, as long as the edge did not get moistened by the filling.


Here are the rolls, ready to be cut: pistachio-dusted with white chocolate and diced dried apricots and bing cherries in the middle, walnut-dusted with ganache and crushed coconut cream candies, almond-dusted with caramel and almond slivers, chocolate-shaving-dusted with caramel and ganache, and chocolate-shaving-dusted with ganache and dried raspberries (Not Pictured: the ugliest but perhaps tastiest roll that was the unfortunate guinea pig: pecan-dusted with caramel, ganache, and pecans. I got ambitious and tried to stuff it way too full!).


Here is the messiness that resulted. The rolls being soft and the fillings being of different consistencies, they were difficult to cut evenly. The caramel layer was too thick in most of them, so next time I would make the caramel in a larger pan, or just roll slivers of caramel in the center of some. I would have loved to put toasted shredded coconut in some, but was unable to obtain some prior to making these.

I think it did work to dip the bottom of each cut piece into melted chocolate in order to keep the rolls together, and I am glad that I stuck them in the fridge in order to make them harden quickly and keep the ganache cool. They just had to sit at room temperature a little while before serving so that the caramel could become chewable rather than cooled stiff.


So many things to consider for next time! I definitely plan to scale back the rolls by making the fillings thinner and cutting the pieces smaller (and neater, hopefully). I look forward to serving them on beautiful sushi plates sometime, each roll topped with a fresh raspberry, toasted coconut, or mint leaves, but meanwhile, these tasted good. The scheming will continue until I am satisfied.

Tuesday, May 13, 2008

Tasting Paris


Friends, welcome to a tasting of my lovely Parisian weekend; these photos are highlights from the baked goods and pastries that I enjoyed. I'll write more on the stories behind my experiences at another time, but I just wanted to give you un petit goûter of my companions on this mini-vacation.

This first photo was of some wonderful macarons that I ate while lazing in the sun for three hours on the Champs de Mars. Left to right, we have caramel flavored with fleur de sel, chocolate-violet, vanilla, and raspberry. The shop guy threw one in for free, which really made my day! French people were so nice to me on this trip. My favorites were the caramel and the vanilla, plus the pistachio which I consumed before taking the picture...


This is an individual-sized kouglof at Notre Dame. The kouglof is an Alsacian speciality; it's a flaky sort of bread-cake with a moist interior and spiced and well-sugared outside. I'm thinking bread-cakes are something new I'll have to explore - I tried a few that were drenched in syrup or other flavorings, and they still have to grow on me before I rave about them. I did like this one, though.


I'm not too crazy about this photo at Sacré Coeur, but I just had to include it because this is bread from Poilâne, called by my food guidebook the "Mona Lisa" of bread bakeries. Poilâne represents one of the first French bakers to revive the making of artisanal breads in the past few decades; it is a wonderfully-crusted, slightly sour bread with a marvelously textured interior. I ate it on its own, I ate it with creamed honey, I ate it with cheese. Yum.


Again, macarons, this time on the Pont des Beaux Arts, with Ile de la Cité (home of Notre Dame and more) in the background. Before this trip, I was a macaron virgin - something I did not want to admit to foodies. But now that I have eaten my first macarons from Pierre Hermé, I am ashamed no more. They were by far my favorite eats of the trip (hence the first picture at the Eiffel Tower, which were my second purchase of macarons). I have never eaten anything so amazing. Somehow the meringue halves are just crusty enough on the outside to hold things together, but give away delicately to a slightly chewy but soft and then ecstatically creamy center. These were even more delicate than the Eiffel Tower macarons (purchased at a less-renowned but still adequate bakery), as you will see by the slightly crunched one at the lower left - this from just having been carried in a plastic bag for a few blocks. I. Loved. Them. Clockwise from top left: vanilla, rose (my second favorite), bittersweet chocolate, and pistachio-raspberry (my favorite!).


One of the chocolate ganaches I purchased from chocolatier Christian Constant, pictured in the Luxembourg Gardens. This almond praline ganache is posed on a velum menu that describes each of the ganaches they sell, on top of one of the many green chairs available throughout all Paris public parks (a thing I love about socialism in France). Each of the ganaches was so smooth and melty...


And because I had to break the sweets up with some savory stuff, I got a sandwich grec to eat by the Seine - roasted lamb on a pita with some of the best french fries ever - in memory of my student days in Paris, when this was an expensive treat.


And, second only to the macarons, hand-made marshmallows accompanied me to the Louvre. Lightly flavored with rose and perfectly fluffy and chewy at the same time, these challenged my guimauve-making skills and primed me for my next attempt. I loved their uneven exterior and perfect texture with each bite.

I can only hope that my next visit to Paris will be soon and just as, um, productive.