Showing posts with label bread. Show all posts

Thursday, July 21, 2011

Strawberry Banana Bread


I am super excited about this banana bread. Like super, super excited. Not only is it amazing banana bread, but you can actually taste the strawberries in it. I tend to find that "strawberry" baked goods either have a strongly artificial flavor (which I honestly don't mind sometimes, but it's not my fave) or don't have any strawberry flavor, regardless of whether you crush/macerate/purée/boil them down ahead of time. And I don't usually choose anything strawberry banana if I have a choice (strawberry banana yogurt? no thanks! the banana ruins it!). But this bread, this I choose.

In this bread, you simply add fresh diced strawberries to the batter, and you can taste them in the finished product. Voilà! Of course, your strawberry flavor will be as good as the flavor in your strawberries. The teeny berries I've got here in Berlin, which go bad quickly and don't even look that good in the store, actually have great flavor. They're tarter than the ones I buy in California, but they complement the sweetness of this bread so well. It makes me remember that buying cheap berries in Cali means that they often taste like water, and not much like strawberries (sorry Trader Joe's, on this one account you disappoint). So buy good, strongly flavored berries, and heck, buy a lot of them just to eat them - then if some start to get mushy, bruised, or moldy, you can cut off the bad parts and use the good parts to make this bread.


It helps that there are spices and Amaretto here to greatly adorn the strawberries and bananas, plus a topping of crusted sugar to keep it all happy. I love that I based this recipe on one called "jacked-up banana bread" on smittenkitchen's blog, and I jacked it up some more - replaced some of the bananas with strawberries, swapped the bourbon out for Amaretto, added more butter (accidentally doubled it the first time! darn european conversions), and slapped the sugar crust on top for good measure.

Only make this if you're ready to make your kitchen smell heavenly!


Strawberry Banana Bread

Preheat the oven to 350 degrees, and grease a loaf pan.

In a mixing bowl, place:

2 ripe bananas, smashed
1 C (approx.) diced strawberries

Stir in:
1/2 C (1 stick, ~100 g) salted butter, melted

Then add:
1 C (170 g) brown or raw sugar
1 egg
1 tsp vanilla
1 T Amaretto (or whatever you've got in the cabinet, except vodka, 'cause it's got no flavor)

And then:
1 tsp cinnamon
1/2 tsp nutmeg
pinch ground cloves

Sprinkle over mixture and stir in:
1 tsp baking soda
pinch salt

Then mix in until just combined:
1 1/2 C (180 g) flour

Pour into loaf pan. Bake for 45 minutes, then remove from oven. Generously sprinkle raw or white sugar over the top of the loaf, then wet the sugar down with Amaretto (as with this pine nut cake). Place back in the oven for another 5 minutes, or until a utensil comes out clean. Let cool in pan before serving.

Makes one loaf, and very few dirty dishes.


Yeah, I had to make two after I got a little too experimental the first time around; the cake was great, but I wanted to try to make frosting with quark, which rendered the bread soggy enough to be bread pudding. Which my British roommate liked, so she gets to finish it. For the rest of us, there is this new and improved crusty version.

P.S. It would be great without the sugar crust too, just eliminate that step and bake until a utensil comes out clean. If you like things a little less sweet, you can reduce the sugar in the bread to 3/4 of a cup also.

Sunday, January 24, 2010

Basic Muffin Recipe: Almond Apricot, Coffee Chocolate Chip, and Banana Nut Spice


Got up one morning on a rainy holiday, and what did I do? Made muffins. It would have been hard not to do, honestly. Now that I'm back on a baking kick, free time means recipe time, and a rainy day said comfort food to me.

I realized that I don't actually make muffins that often, so the consistency of the batter felt a little foreign to me. This is a really thick, dense batter, which results in dense, moist muffins. The density also meant that the muffins didn't rise that much, but being used to cupcakes that rise a lot, I didn't put quite enough batter in each muffin mold to make muffin tops. I think I would almost want to call these tea cakes rather than muffins given the texture, but muffins come in all manner of varieties - some batters are thick, some are thin, some are almost cake. Still, they turned out well, and were lovely right out of the oven with a cup of tea.

For Christmas I received the relatively new baking cookbook from America's Test Kitchen, an enterprise that produces classic recipes, all well-tested and excellently explained. I decided to make this muffin recipe because it can be a basis for a number of versions, including the two I picked: Almond Apricot, Coffee Chocolate Chip, and Banana Nut Spice. The almond apricots and banana spice were definitely my favorites, since a coffee-flavored muffin seemed a little redundant to me (do you want to eat something coffee-flavored with your coffee?).

So here you go! Sub in your own add-ins (extracts, zest, dried fruits, nuts, etc.) for those given:

Basic Muffin Recipe
from Big Beautiful Muffins in The America's Test Kitchen Family Baking Book

3 C flour
1 C sugar
1 T baking powder
1/2 tsp baking soda
1/2 tsp salt
1 1/2 C whole or non-fat plain yogurt (I used Greek)
2 large eggs
8 T (one stick) unsalted butter, melted and cooled

add-ins:
Almond Apricot: add 1/2 tsp almond extract to the yogurt mixture, fold 1 C finely diced apricots into the final batter, and sprinkle a few sliced almonds over the muffins before baking.
Coffee Chocolate Chip: add 3 T instant coffee or espresso to the yogurt mixture, fold 1 C semisweet chocolate chips into the final batter.
Banana Nut Spice: add 1/2 tsp nutmeg and 1 tsp cinnamon to the dry ingredients, fold 1 1/2 C finely diced banana and 1/2 walnut bits into the final batter, and sprinkle cinnamon sugar liberally over the muffins before baking.

1. Adjust an oven rack to the middle position and heat the oven to 375 degrees. Grease a 12-mold muffin tin. Try to not use muffin papers - this causes them to be paler and not rise as much, plus the papers stick to the muffins.

2. Whisk the flour, sugar, baking powder, baking soda, and salt together in a large bowl. In a medium bowl, whisk the yogurt and eggs together until smooth (plus any add-ins for this stage). Gently fold the yogurt mixture into the flour mixture with a rubber spatula until just combined, then fold in the melted butter (and any add-ins for this stage).

3. Portion the batter into each muffin cup equally (should make 12). Bake until golden brown and a toothpick inserted into the center of a muffin comes out with just a few crumbs attached, 25 to 30 minutes, rotating the pan half-way through baking. Mini muffins will take more like 15 minutes.

4. Let the muffins cool in the pan for 5 minutes, then flip out onto a wire rack, and let cool for 10 minutes before serving.

Sunday, March 8, 2009

Pitas in Action

Just in case you, like me, are procrastinating, I have prepared a series of time-consuming videos of pitas being baked. This is tangentially related to an archaeology exam I have coming up, so we'll just say that I'm only half-procrastinating. Click on the photos below to view the videos on youtube.

Disclaimer: This is not the complete history of the pita bread. This is for procrastinatory purposes only.

This is the first video I came upon, which most closely reflects the process of ancient pita baking: a round oven, heated so that the walls retain lots of heat and the bread puffs within minutes of being stuck it in (there, that's somewhat studious).


I couldn't make it through this whole video, but I thought it was funny. Be glad I do not present my recipes this way.


The first of two very different industrial pita machines; beware, the dough at the beginning looks a little gross. And then it just stretches, and stretches...I found myself wondering if I was watching the wrong video, because it took a while to look like pitas.


This is a thorough machine that makes the dough in circles from the beginning rather than cutting them out:


And for those of you who want to just sit in front of the screen and watch a pita rise in real time:


And to think that you could have made your own pita dough in the time you took to watch those videos - ha! That's what procrastination is all about.

Saturday, December 13, 2008

Whole Wheat Pita Pockets


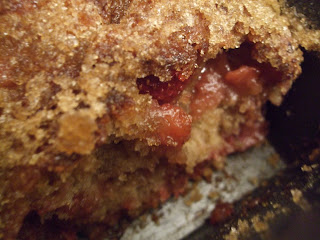
During my time in Israel I got hooked on the fresh, soft pita we had every day (with PBJ, or tuna salad, or lunchmeats, or pickles...), and the experience really made it difficult to go back to packaged pitas here in the States. So, upon my return I asked one of my bread expert friends for a pita recipe, and you see the result here! This was the third time I made them, and they finally came out with satisfactory pockets:

They may be a little funny looking on the outside, but they are soft and very stuffable. Next time you make lemon garlic hummus (or buy it, fine), try whipping up a batch of this dough. It's not hard, really! You mix it up, let it sit overnight or even more, and then shape it and bake it. The shaping takes a little longer than you expect, so take that into account. But do not be intimidated by the length of this post!

The one part I find difficult (which impeded the development of my pockets a bit) is getting the pitas onto the hot pan; I kind of end up throwing each pat of dough into the oven, praying that it does not fold over on itself when it lands. Until I get a cool tool like the Super Peel or even a simpler wooden version of a peel, or until I decide to use a piece of parchment for every pita to transfer it into the oven, I'll probably just continue throwing the pitas in the oven one at a time.

For me, the funnest part of this is that the pockets just form of their own accord - well, really, they form because the oven or pan is so hot that steam forms quickly on the inside of the bread and puffs it up all together - but it looks like magic when you don't know what's causing it. Bread is so fascinating!

So flour your hands and throw this dough together from the ingredients you know you already have; why not have fresh pitas ready for your holiday leftovers? (hm, pita with shredded turkey thigh, a little stuffing and gravy, lined with cranberry sauce, maybe some pesto...remember that idea...)

Whole Wheat Pita Pockets
From The Bread Bible

Minimum rising time: 1 hour
Oven temperature: 475 degrees or higher
Baking time: 3 minutes per pita
Makes: 12 four-inch pitas or 8 six-inch pitas

3 C and a scant 1/4 C White Whole Wheat Flour (King Arthur brand)
2 tsp salt
2 tsp instant yeast
2 T olive oil
1 1/2 C water at room temperature

Mix dough at least 1.5 hours before shaping, or up to 3 days ahead (dough will keep in the refrigerator).

If you have a stand mixer/Kitchen Aid: Place all ingredients in mixer bowl and mix on low speed with paddle attachment (speed #2 for Kitchen Aid) for about 20 seconds until flour is moistened. Change to the dough hook attachment and knead for 10 minutes at a medium speed (#4). The dough should clean the bowl and be soft and a little bit sticky to the touch. Scrape down the sides and bottom at least once during the process (turn the mixer off first!) in order to ensure that the flour on the bottom of the bowl gets incorporated. Add a little flour or water to adjust the stickiness.

If you are mixing the dough by hand: Combine all the ingredients except for the scant 1/4 cup of flour. With a wooden spoon or your hand, mix until the flour is moistened. Knead the dough in the bowl until it comes together. Sprinkle a little of the reserved flour on the counter and pour the dough out onto it. Knead for 5 minutes, adding as little of the remaining flour as possible to prevent sticking. Use a dough scraper to scrape and gather the dough together as you knead it. It will be very sticky. Cover the dough with the inverted bowl and let it rest for 5 to 20 minutes so that it will become less sticky. Knead the dough for another 5-10 minutes until it is soft and smooth and just a little sticky to the touch. Add a little flour or water if necessary.

After either mixing and kneading the dough by mixer or by hand, let the dough rise in a large greased bowl. Press the dough into the bowl and spray or oil the top of it. Cover the container with a lid or plastic wrap. With a piece of tape, mark the side of the bowl at the height to which the dough should rise, about double the original height of the dough. Refrigerate the dough overnight or up to three days, checking every hour for the first 4 hours and pressing down if it starts to rise (I often forget to check and it turns out fine).

When you're ready to shape the dough, preheat the oven to 475 or 500 degrees one hour before baking. Have an oven shelf at the lowest level with a baking sheet, baking stone, or cast iron skillet on it to heat with the oven.

On a lightly floured surface, cut the dough into 8 (for bigger) or 12 (for smaller) pieces. Work with one piece at a time, keeping the rest covered with a damp cloth. On a lightly floured counter, with lightly floured hands, shape each piece into a ball and then flatten it into a disk. Cover the dough with oiled plastic and allow it to rest for 20 minutes at room temperature. Roll each disk into a circle a little under 1/4 inch thick. Allow them to rest, uncovered, for 10 minutes before baking.

To bake the pita, quickly place 1 piece of dough directly on the baking surface and bake for 3 minutes. The pita should be completely puffed but not beginning to brown. The dough will not puff well if it is not moist enough. See how the pita puffs, then, if necessary, spray and knead each remaining piece with water until the dough is soft and moist; allow to rest again and reroll as before (but even if they don't puff they taste great). Proceed with the remaining dough, baking 3 or 4 pieces at a time if using a baking stone or sheet. Using a pancake turner, transfer the pita breads to a clean towel, to stay soft and warm. Allow the oven to reheat for 5 minutes between batches. The pitas can be reheated for about 30 seconds in a hot oven before serving.

To cook the pitas on the stovetop, preheat a griddle or cast-iron skillet over medium-high heat. Lightly grease the surface and cook the pitas one at a time. Cook for about 20 seconds, then turn the dough and continue cooking for 1 minute or until big bubbles appear. Turn the dough again and cook until the dough balloons. If the dough begins to brown, lower the heat. The entire cooking process for each pita should be about 3 minutes.

Both oven-baking and stovetop cooking are easy, so take your pick!

Wednesday, October 15, 2008

Whole Grain Beer Bread


I've continued to make beer bread on almost a weekly basis, so this past week I decided to try it with some whole grains in place of the flour, and it worked famously! It has also turned out very well with all whole wheat flour. Here's an even healthier upgrade for this super-easy bread:

In place of the 3 C of flour, use 2 1/3 C whole wheat flour, 1/3 C wheat bran, and 1/3 C ground flax seed. Replace the bran or flax seed with other grains at will; I tried out oats.

It may be a bit more crumbly this way, but it's still moist and hearty. I may even try upping the ratio of whole grains to flour, so we'll see how high I can go before the integrity of the bread is compromised...

On another note, I also tried this with a different kind of beer - Bud Light - and could taste the different tenor of the beer in the bread, but it still tasted great.

I'll start posting on soups soon to welcome in the fall weather, so you can keep this bread in mind to accompany some comforting soup.

Monday, September 22, 2008

Whole Wheat Beer Bread

I am in love with this bread. I've been meaning to make it for weeks with some leftover beer in the fridge, and finally got it together today. The ingredients are few, it only got one bowl dirty, and the aroma filled the apartment quickly. Once cooled, this slightly sweet, hearty bread had great flavor. I think I would even buy beer for the purpose of making this bread!

Whole Wheat Beer Bread
Based on this white beer bread recipe.

Preheat the oven to 375 degrees.

Sift together:
1/2 C all-purpose flour (try subbing whole wheat flour)
2 1/2 C whole wheat flour (King Arthur's White Whole Wheat is a nice, fine flour)

Mix in:
3 tsp. baking powder
1 tsp. salt
1/4 C sugar

Once the dry ingredients are well mixed, add:
1 (12-oz.) bottle of beer

Pour batter (should be foamy and thick, but light enough to stir well) into a greased or parchment paper-lined loaf pan.

Pour 3 T melted butter over the batter.
Bake for 1 hour, remove from pan and cool at least 15 minutes. See original recipe for notes on baking with non-alcoholic beer.

I decided to top it with a nutty honey butter, so I tossed some margarine, honey, walnuts, and a teeny touch of brandy into the food processor for a spin. Voilà! So good that I've gotta give half of the loaf to my neighbor...