Thursday, June 30, 2011

St. Louis Gooey Butter Cake


Wow, I can't believe I never posted this! I started a draft of this post more than a year ago, and here I am again.

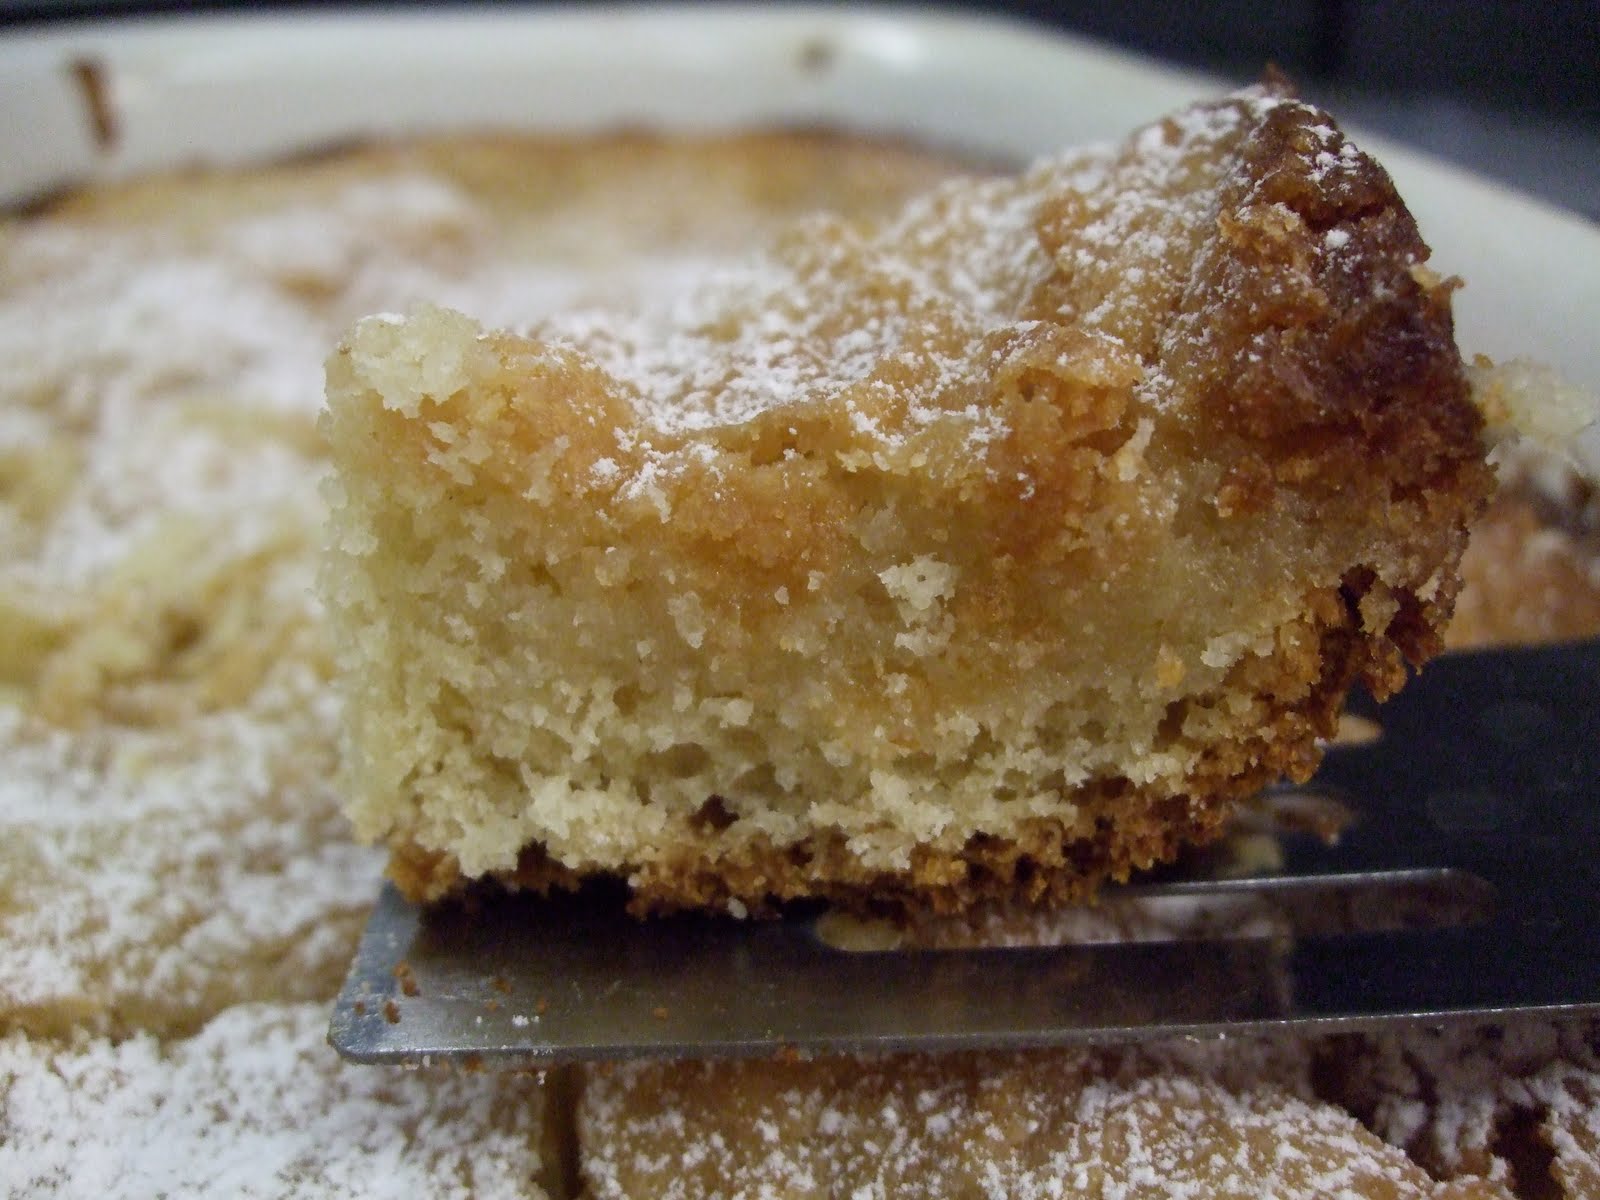
Despite the delay since I actually made this cake, it is absolutely worth posting. I still remember very clearly this unique and delightful cake, not too sweet and oh so buttery. There is something fascinating to me about a yeasted cake, with a slightly gooey topping that sort of seeps into the bottom cake layer. Like many of my favorite recipes, this one comes from smittenkitchen.

The layered cake concept also brings to mind a blueberry ricotta cake I recently made from King Arthur Flour, which is also a two-layered cake, but in this case tends towards a cheesecake consistency with an upper layer of a ricotta mixture (check it out since I didn't take any photos to make a post of it!). I am further reminded of this recipe for Lemon Cake Top Pudding, which ends up, well, with a cake-like top after you bake it, and pudding underneath - so interesting! Will make that one of these days.

In any case, I do not know why or how this comes from St. Louis, but I'm certainly glad it did! Whoever named it "gooey" and "butter" deserves a reward, because it is both of those things to everyone's delight.

See how the top layer gooeys into the bottom?? I take great pleasure in thinking of the word "gooey" as a verb - to gooey, gooeying, gooeyed. Why not? No other English word really has the same nuance.


Let's do this thing! Take care to save time for letting the dough rise, and make sure to not over bake it (see the instructions on baking pan choice). A stand mixer is necessary for the long periods of time that the dough gets beaten; a handheld electric mixer would not be hardy enough.

St. Louis Gooey Butter Cake

Cake ingredients:
3 T milk at room temperature
1 3/4 tsp active dry yeast
6 T unsalted butter at room temperature
3 T sugar
1 tsp kosher salt
1 large egg
1 3/4 C flour

Topping ingredients:
3 T plus 1 tsp light corn syrup
2 1/2 tsp vanilla extract
12 T (1 1/2 sticks) unsalted butter at room temperature
1 1/2 C sugar
1/2 tsp kosher salt
1 large egg
1 C plus 3 T flour

Powdered sugar for sprinkling

Preparing the cake dough:
Mix the milk with 2 T warm water in a small bowl. Gently whisk in the yeast until it dissolves. Mixture should foam slightly.

In a stand mixer with the paddle attachment, cream butter, sugar, and salt. Scrape down the sides of the bowl and beat in the egg. Alternately add the flour and the milk mixture, scraping down the sides of the bowl between each addition. Switch to a dough hook after everything has been added, and beat on medium speed until the dough has formed a smooth mass and pulled away from the sides of the bowl a little, 7-10 minutes (may still be very soft in the end).

Press, stretch, and nudge the dough into a greased 9x13 baking pan at least 2 inches deep; a metal cake pan will produce faster browning on the bottom of the cake, whereas a cake dish as I used (glass or ceramic) will produce less. If you use a metal pan, you will want to check the cake after 30 minutes of baking, rather than 45.

Cover dish with plastic wrap or a clean tea towel, place in a warm area, and allow to rise until doubled, 2 1/2 to 3 hours.

Preparing the gooey topping:
After the cake dough has risen, preheat the oven to 350 degrees. In a small bowl, whisk the corn syrup together with 2 T water and the vanilla extract. Using a stand mixer with paddle attachment or an electric mixer, cream butter, sugar, and salt until light and fluffy, 5-7 minutes. Scrape down the sides of the bowl and beat in the egg. Alternately add the flour and corn syrup mixture, scraping down the sides of the bowl after each addition.

Spoon the topping in large dollops over the risen cake and use an offset spatula to gently spread it in an even layer. Bake for 30 to 45 minutes (30 for metal pan, 45 for glass or ceramic dish); you may want to check it earlier than the prescribed time to ensure avoiding over baking. The cake will rise and fall in waves and have a golden brown top, but will still be liquid when done (I wished mine had been a little more liquid, but checked it too late).

Cool in pan, then sprinkle with powdered sugar before serving.


Friday, June 10, 2011

Whole Grain Blueberry Pecan Muffins with Ricotta Filling (Gluten-Free)


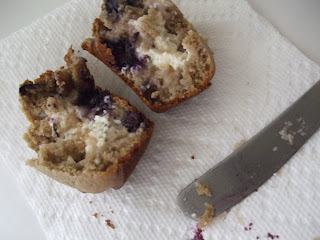
Here's the gluten-free muffins as promised - tender, moist, and flavorful. I am now a firm believer that gluten-free baking can work without gimmicks or difficult tricks, and be super tasty.

I relied on Gluten-Free Girl again to understand how to use the variety of gluten-free flours and starches that I've got in my cupboard. She's made gluten-free baking work without xanthan gum, or any other gum to provide binding in the baked goods, which is good news both for those who might be digestively sensitive to the gums or who would have a hard time finding them in the grocery stores.

Now that I've tried these, I fully believe what GFG says - gluten-free baking can produce lighter, better texture than gluten baking, because gluten can bind things up and weigh them down. That's why some recipes tell you not to over mix the batter - because the mixing action will create too much gluten and make a dense product.

You have a choice about the flours and starches you use in these muffins; GFG suggests keeping a supply of your own whole grain flour mix around, and provides a ratio of flour to starch (70/30) that you can use to create your own (I recommend reading her post linked above, it's much more thorough).

It is important to note that your baked goods will taste like the flours you choose; I was super curious about teff flour, so I mixed it with sweet sorghum and amaranth flours, with white rice flour as the starch and a few whole oats thrown in for texture. Teff turns out to have a fairly strong flavor (reminded me of a powdery buckwheat), so I would reduce the amount I would use of teff next time in proportion to the other flours, and probably choose another flour that does not have such a fine texture as the ones I chose. That being said, I still devoured four muffins as soon as they came out of the oven. Plus another one later - so, yeah, they turned out okay.

To make your own gluten-free flour mix, take 70% whole grain flours and mix with 30% starches.

Whole Grain Flours:
Almond
Amaranth
Brown Rice
Buckwheat
Corn
Millet
Oat
Quinoa
Sorghum
Sweet Brown Rice
Teff

Starches:
Arrowroot
Cornstarch
Potato Starch
Tapioca Flour
White Rice Flour


I also integrated a little advice from the Barefoot Contessa (incidentally, she is someone who I imagine never actually goes barefoot) who suggests greasing the tops of your muffin pans as well as the inside of the cups, to help you remove the muffins when they've cooled:


And I decided to make a ricotta filling for the muffins to use up some ricotta in the fridge, so I used the technique and amounts at this smittenkitchen recipe.

You can add any combination of nuts, dried or fresh fruits, or spices that you like - I went with frozen blueberries and pecans. The flavor of a lot of these flours is nutty, so the pecans were a good complement, and added nice texture.

It's possible to make the whole thing dairy-free too; just replace the buttermilk with almond or soy milk that you've curdled with 1 T apple cider vinegar, and eliminate the ricotta filling. GFG says that you can make them without eggs, but you'll have to see her instructions to see how to accomplish that.


Whole Grain Blueberry Pecan Muffins with Ricotta Filling
Gluten-Free

Preheat oven to 350 degrees. Grease a muffin pan or two (with filling, my batter made 17 muffins).

In a mixing bowl, whisk together to combine and aerate:

350 g whole-grain flour mix
1/2 tsp baking soda
1/4 tsp baking powder
180 g brown sugar
1 tsp kosher salt

In a separate bowl, whisk together:

2 eggs
1 1/4 C buttermilk*
1/3 C grapeseed oil

Use a rubber spatula to mix the wet ingredients into the dry. When they are almost fully combined, throw in any additions to you want (about a handful of chopped nuts and a handful of fruit will do; firm fruits may take longer to bake soft). Stir until all traces of flour are gone.

If you want the ricotta filling, combine:

1/2 C ricotta cheese (fat-free is fine)
6 T Greek yogurt or sour cream
pinch salt


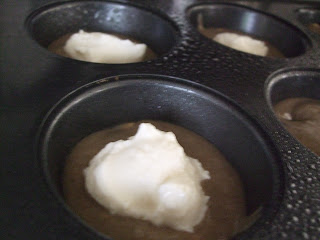
Fill each muffin well 1/3 full with batter, plop 1 T of ricotta filling on the batter, then cover with more batter until the well is 3/4 full. The muffins will rise, but not like crazy, so you don't have to worry if the wells are close to full.

Bake about 25-35 minutes, until muffins are browned, the tops spring back to touch, and a knife comes out clean.


*Buttermilk may always be replaced by regular or soy/almond milk that has been curdled with apple cider vinegar. The proportion is 1 T vinegar to 1 C milk; just dump the vinegar in the milk before you set up the rest of your ingredients and pans, and it will be ready when you need it.


*** I'd like to note that the best whole grain combination I've come up with so far was a mix of cornmeal and almond meal for the whole grain flours, and corn starch for the starch. Great texture and taste!

Monday, June 6, 2011

Lemon Cornmeal Pancakes (Gluten-Free)


A generous friend recently gave me a whole box of gluten-free baking ingredients; while I am not gluten-free, baking alternatives always interest me. I feel like I've developed a sense of the necessary components of baked goods with gluten, so I've been reading gluten-free recipes for a while to get an idea of how they work. Most of the time, I am not excited enough about a recipe to buy the different flours, starches, and gums required of gluten-free baking, so I never have the exact ingredients necessary.

Now that I DO have the ingredients, however, the experimentation has begun. I read a bit of the theory on Gluten-Free Girl's blog, and explored recipes on websites including King Arthur Flour, which sells quality ingredients and has nice recipes. On the King Arthur site, this recipe for Lemon Cornmeal Pancakes caught my eye because they just sound bright and cheery - and that's exactly how they turned out! Lemon zest really is a magical ingredient, and is a happy complement to the slightly crunchy cornmeal.


The original recipe calls for potato starch, which I didn't have, so I subbed in tapioca flour/starch (understanding from Gluten-Free Girl that different starches generally serve the same chemical role in a given baked good). I used the melted butter option, since I love butter, but it may be made dairy-free as well by using olive or canola oil instead of butter, and almond or soy milk instead of the milk. I always enjoy the flavor combination of olive oil and lemon, but if olive oil disagrees with you or is too strong a flavor for you, canola may be a better choice. I did end up adding an extra tablespoon of milk to thin out the batter, and they turned out well.

These pancakes are an easy foray into the world of gluten-free goods because they use ingredients that are naturally gluten-free but not that hard to find, and the process of making them is not difficult. Cornmeal is used in Johnnycakes, so it is a time-tested pancake option, producing nice texture and mild flavor. I'm pretty sure my guest did not realize these were gluten-free, so that says something, right?

I'll be working on some whole grain gluten-free muffins later this week, so stay tuned!


Lemon Cornmeal Pancakes

In a mixing bowl, whisk together:

1/2 C potato starch or tapioca flour/starch
3/4 C cornmeal (whole grain or regular)
3 T sugar
1 1/2 tsp baking powder
1/2 tsp salt
3/8 tsp xanthan gum

In a separate bowl or measuring cup, beat together:

2 large eggs
3 T melted butter or vegetable oil
3/4 C milk
2 T grated lemon zest or 1/2 tsp lemon oil (I used the zest of two lemons)

Whisk the wet ingredients into the dry ingredients. The batter should be thinner than normal pancake batter, so if it's not add another tablespoon or two of milk to the batter.

Preheat a pan or griddle to medium-high heat; if you have an electric griddle set it to 350 degrees. Grease the pan or griddle.

Pour about 2 T of batter per pancake into the pan. Cook each pancake for 1-2 minutes, until the top is bubbly and the edges are dry, and then flip and cook for another minute or so on the other side.

Serve hot with maple syrup, agave syrup, berries, whatever suits your fancy.


Sunday, May 29, 2011

Honey Vanilla Marshmallow Fluff


Not to be fickle to my past loves, but I have just fallen in love anew. With yet another marshmallow-related treat. That is so, so easy to make - unlike those millions of batches of guimauves I've made in the last few years. Really, in the original recipe, the procedure lists ONE step. Amazing.

If you're a fan of good ole Kraft Marshmallow Fluff, you've got to try this. You could even make it all organic, with agave! It does take raw eggs, so if you are wary of that risk I'm afraid I don't have another option for you yet (haven't tried powdered eggs whites at this time).

All you have to do is throw the ingredients into a bowl and whip them up with an electric mixer, and voilà! Light, fluffy, sweet goo with a hint of honey and a touch of vanilla. Wonderful swirled into ice cream or on top of it; great in peanut butter sandwiches; delightful swiped off the side of the mixer bowl. I'm thinking this will make a yummy gift as well, especially since my collection of glass jars to reuse is starting to fill up their drawer. And this makes a huge amount that I could (well, should) never finish by myself in the 3 weeks it stays good.

Making this reminded me of this episode of The Best Thing I Ever Ate, in which Duff and the folks of Charm City Cakes get a crazy-looking ice cream sundae called the "CMP" at Woodberry Kitchen in Baltimore, MD. CMP = Chocolate, Marshmallow, & Peanuts. Peanuts steeped in sugar syrup dumped over three scoops of vanilla ice cream, topped with organic ganache and marshmallow fluff, sealed into a glass with a disk of cooked hard crack sugar (seriously, blow torched around the edges of the glass!). As soon as I got just a little glimpse of that sundae, I coveted it with a passion. This is me, still thinking about that one minute clip of a TV show 6 months later. So making this fluff was the perfect opportunity to make my own version of CMP. I don't keep peanuts around, but I boiled some pecans in simple syrup, threw them on a scoop of my homemade coconut ice cream, topped it with some bittersweet ganache, and then a pile of this fluff. CMP = OMG. The bittersweet chocolate with the sweet fluff was perfect.


The fluff turned out very sweet for me, so the recipe below includes a tad less agave than I used. If agave is too strong of a flavor for you, you may replace some of it with light corn syrup, or swap it all out for one cup of corn syrup.


Honey Vanilla Marshmallow Fluff
based on this recipe, referral thanks to my friend at Movies and Munchies

2 large egg whites
3/4 C agave syrup
1/4 C honey
pinch salt
1 C confectioner's sugar
2 tsp pure vanilla extract

Place the egg whites, agave, honey, and salt in a mixing bowl or the bowl of your stand mixer. Use an electric hand mixer or a whip attachment for your stand mixer to whip the ingredients on medium high speed for 5 minutes, until the ingredients have doubled in volume and look pale and thick. Slowly beat in the sugar, then mix in the vanilla.

Store fluff in an airtight container in the refrigerator for up to 3 weeks. Lick the bowl so that none gets wasted.


Tuesday, May 24, 2011

Royal Wedding Cake: Chocolate Digestive Biscuit Cake


Yes. This is the Royal Wedding Cake that Prince William chose. The one that was not the fruitcake. The one that was not decorated in white icing. The one that is super easy to make, and as rich as a candy bar.

They say that British foodies were appalled at the low cuisine profile of this no-bake digestive biscuit cake, but it cannot be denied that everyone likes this dessert. I mean, who doesn't like candy bars? And I'm sure the royal bakers did not complain that at least one thing about this wedding was simple, even though they did dress it up elegantly (scroll all the way down this article to view the royal chocolate cake).

You can find digestive biscuits (McVitie's brand or otherwise) in the States easily enough; CostPlus World Market has a few brands, and I even found them at a local Persian market. I made the cake with plain biscuits, since the cake was so chocolaty I thought it would be good to add some non-chocolate crunch, but you may use the chocolate biscuits if you want to be completely true to Prince William. And no, they don't actually affect your digestion; don't be driven away by the unappealing name of these cookies, since they are not so different from graham crackers.

I decorated mine with some yummy Belgian chocolate caramel crisps and some more crumbled biscuits, but you could go without decoration, or create a riff of your own. Regardless, it will taste great, and serve a LOT of people; few people can eat more than a small sliver of the dense chocolate.


Royal Wedding Cake: Chocolate Digestive Biscuit Cake
Taken from seriouseats.com

800 g bittersweet chocolate (chips work)*
1 1/4 sticks unsalted butter, cut into 1 inch pieces
2/3 C corn syrup (or golden syrup, if you've got it)
275 g digestive biscuits

Prep:
Line a 9 or 10 inch springform pan with parchment paper on the bottom. You may make a tiered cake with one 4.5 inch and one 6 inch springform pan. This cake would be difficult to remove from a regular cake pan, and the sides come out shiny and smooth, so you don't want the parchment paper to creep up the sides. Break biscuits into bits 1/4 inch or so, as pictured below (for fun, use your bare hands on the biscuits!), and set aside in a large mixing bowl.


Heating:
In a double boiler, combine the corn syrup (or golden syrup) and butter, stirring until butter is melted. Add the chocolate and stir until all is melted.

Combine and mold:
Pour melted chocolate mixture over the biscuit bits and stir until well combined. Pour mixture into prepared pan and smooth the top with a spatula.

Let cake set in the refrigerator until the chocolate is hard and shiny, at least four hours. Unmold and cut with a sharp knife in very thin pieces when serving.


*Gram amounts can be estimated by the weight listed on the package you purchase if you don't have a kitchen scale. This is not a fussy recipe, so don't worry about being accurate to the gram.