Showing posts with label ice cream. Show all posts

Wednesday, March 16, 2011

Chocolate-Coconut Sherbet


And now back to the super easy ice cream recipes; this one happens to also be dairy-free with the possibility of a low-fat option. The cookbook description calls it something like Mounds in a cup - if you like coconut and chocolate, you'll like this!

After experimenting with a coconut-based vanilla rum ice cream (recipe still to be perfected), I've realized that great coconut flavor comes from coconut cream, so I might try to make a version of this with coconut cream to replace the coconut milk and sugar components. Meanwhile, I would recommend this as an easy recipe that is refreshing, but a little icy and very sweet. To be eaten in small amounts, or paired with a creamier, less-sweet ice cream like the caramelized white chocolate recipe I just posted.

Chocolate-Coconut Sherbet
from David Lebovitz' Ready for the Dessert

1 C water
1 C sugar
5 oz. bittersweet or semisweet chocolate, chopped
2 C canned Thai coconut milk (low-fat will make this icier)
1-2 T dark rum (dark rum has a more caramelly flavor than light)

In a medium saucepan, heat the water and sugar til boiling. Stir to dissolve. Whisk in the chocolate off the heat until completely melted. Stir in coconut milk and 1 T rum.

Pour the mixture into a blender and blend until smooth. Taste and add 1 T rum if desired.

Refrigerate until completely chilled, then freeze in ice cream machine according to the manufacturer's instructions.

Tuesday, March 15, 2011

Caramelized White Chocolate Ice Cream


Caramelized white chocolate has become something that I regularly crave (I'm not the only one who gets food cravings out of nowhere, am I?), ever since I found how easy it is to make and how addictive it is to eat. The task ever since that discovery has been finding ways to employ it in desserts - making it into ganache, filling macarons with said ganache, replacing butterscotch chips with it in oatmeal scotchies...and now ice cream, thanks to David Lebovitz who introduced me to the idea in the first place.

This is the first proper ice cream I've made in my machine since I got it (proper ice cream being one with cooked egg yolks), so I was a little bit nervous. The process is simple, but the part I found least straightforward was determining whether or not the cooked mixture was thick enough. The accuracy of my judgment of thickness will develop as I practice more recipes, but with this one it worked well enough - the recipe says to cook it until it coats your stirring utensil, so I made sure to see how the mixture looked on the spoon when it first started to heat up (it slipped right off the wooden spoon), in order to be able to compare against what it would look like when "coating" the spoon.

It really had the nice flavor of the caramelized white chocolate, with teeny bits interspersed throughout to make the texture more complex. This is a very rich ice cream.


Caramelized White Chocolate Ice Cream
Taken from David Lebovitz' recipe here.

8 oz caramelized white chocolate*
1 C heavy cream
2 C whole milk
1/2 C sugar
1/8 tsp sea salt
5 large egg yolks

Mix the still-warm white chocolate in a medium bowl with the heavy cream. Set aside with a mesh strainer over it.

In a saucepan, heat the milk, sugar, and salt together. In a small bowl, whisk the egg yolks, then whisk half of the warm milk mixture into the yolks. Pour the warmed yolks into the saucepan with the rest of the milk.

Cook over moderate heat, stirring constantly until the mixture coats the stirring utensil.

Once it's thickened, pour the mixture directly through the strainer into the white chocolate/heavy cream and stir until smooth. Put the bowl in an ice bath, and continue stirring until it is cool.

Chill completely in the refrigerator, and then freeze in your ice cream maker according to the manufacturer's instructions.


*Permit approximately 20 minutes to caramelize the white chocolate: spread the white chocolate chips or evenly chopped white chocolate in a roasting pan in the oven at 250 degrees, stirring every 8-10 minutes. It will be done when it's browned evenly (but not burnt) and starts to liquify. Use the caramelized white chocolate in the ice cream mixture while it's still warm.

Wednesday, February 9, 2011

Coconut Milk Ice Cream: Blackberry Lemon


So, the good news is that I've found a great coconut milk-based ice cream recipe that's easy to make, experiment with, and render low-fat. The other good news is that you will want to sit down and eat it all at once, which could make this bad news for some of you.

It all started when I was forwarded this link to the best vegan ice cream recipes out there. I don't normally keep ice cream in the freezer, since I'm lactose intolerant, so this vegan ice cream thing is tempting me into a life of constant freezer goodness.

I first made the Caramel-Cinnamon Ice Cream with Black Gingerbread Chunks in a version that involved homemade spiced marshmallows, fleur de sel caramel sauce, Vietnamese cinnamon, dark chocolate chunks, and toasted pecans. I meant it to be a spicy caramely version of Rocky Road, but I'm really at a loss for what to call it. Whatever it was, it was tasty, and the homemade marshmallows really turned into wonderful chewiness in the frozen dessert.


I successfully substituted so many ingredients from the original recipe that I knew I could mess with it even more. This time I wouldn't make the mistake of adding more than a cup of mix-ins, since that made for super chunky ice cream, but I would replace the caramel sauce with blackberry jam and lemon curd, the cinnamon with a touch of ginger, add a bit of agave to sweeten it, and swirl in a ribbon of berry syrup.

The ice cream itself ended up incredibly creamy; next time I would probably leave out the berry syrup and just add it as a topping, since the water content of the uncooked berries froze very hard - or I would make the syrup break the berries down more before swirling it in to the ice cream. The lemon curd really made this flavor, so don't back away if berries and lemon sound strange to you.

Here's my take on this super easy, fabulously adaptable recipe:


Blackberry Lemon Coconut Ice Cream

1 C light coconut milk
2 C lactose-free, vanilla soy, or coconut creamer
1/4 C no sugar added seedless blackberry jam (strain to remove seeds)
1/4 C lemon curd (I love TJ's)
3 T agave syrup
1/4 tsp ground ginger
pinch salt
2 T corn starch
2 tsp vanilla extract

Combine the coconut milk and creamer in a medium sauce pan, along with the jam, lemon curd, agave, ginger, salt, and corn starch. Whisk vigorously to combine and beat out any lumps. Turn on the heat to medium, and whisk occasionally until it just comes up to a boil and has thickened significantly. Cool completely and add the vanilla. Chill thoroughly in the refrigerator. Before churning the ice cream, prepare any add-ins (berry syrup, chocolate chunks, etc.). Once the ice cream base is chilled, churn in your ice cream maker according to the manufacturer’s instructions (mine took 20 minutes total), adding any add-in in the last 5 minutes of churning. Transfer to an air-tight container, and freeze solidly for at least 4 hours before serving.


Blackberry Syrup
1/3 C water
3 T agave syrup
1/4 tsp lemon zest
12 oz. blackberries

Combine ingredients in a medium saucepan over medium heat, and simmer for 8 minutes. Watch to make sure it doesn't boil over, stirring from time to time. After the 8 minutes, remove from heat. Optional: add up to 2 tsp liquor (brandy, framboise, etc.) and another 12 oz. of berries to add texture to the syrup. Let cool before mixing into the ice cream, or serve warm/room temperature as a topping on the finished ice cream.


How to adapt this recipe:
  • Replace the liquid sweeteners (jam, lemon curd, agave) with up to a total of 1 C of another liquid sweetener (the caramel Rocky Road version had 1 C of fleur de sel caramel sauce from Trader Joe's).
  • Replace the ground spice (ginger) with up to 1 tsp of another ground spice (the original had 1 tsp of cinnamon). Take care to not overwhelm the flavor you're trying to achieve - start with 1/4 tsp, taste, add more if you prefer.
  • Add up to 1 C of chunky/chewy add-ins: marshmallows, chocolate chunks, nuts, berries, cookies, cake crumbs, etc. Adding more than 1 C will mean you are chewing your ice cream rather than licking it.


Friday, January 7, 2011

Lime Kefir Frozen Yogurt


My lovely siblings gave me an ice cream maker for Christmas! Another opportunity for scheming. I'm not an experienced ice cream maker, and in fact unsuccessfully attempted an ice cream recipe twice in October, so I feel like I need to work up to making actual ice cream. I made this lemon kefir ice cream a few years ago, and very much liked it.

It is the simplest of frozen dessert recipes: mix, refrigerate, mix, freeze - no cooking required. And it's probably the healthiest of frozen desserts, since it's low-fat and only sweetened by agave syrup.


Lime Kefir Frozen Yogurt

1 2/3 cups kefir (or other fermented milk, or buttermilk, or plain yogurt; low fat makes it icier)
the zest from two limes, microplaned or very finely chopped
1/4 cup lime juice (a little less than the yield of the 2 zested limes)
1/3 cup plus 2 tablespoons agave syrup (or the sweetener of your choice -- maple syrup, rice syrup, honey, or a mix of honey and sugar)
a good splash of rum (or lemoncello, or cachaça) (optional)

Makes about 1/2 liter (1/2 quart).

Combine all the ingredients in a mixing bowl and whisk until blended. Cover, refrigerate for an hour until well chilled, and churn in your ice cream maker according to the manufacturer's instructions. Let it firm up in the freezer in a plastic container; mine took about a day to be firm enough to form scoops, since the mixture is low in fat and my freezer is not the coldest. Has an icy, sorbet-feel to it.


Tuesday, January 4, 2011

Mississippi Mud Pie


I actually spelled out M-I-SS-I-SS-I-PP-I in my head as I typed the title of this post. I love how some mnemonics stick with you for life - it gives me hope that I'll at least remember one word per language I study over the course of my life!

Unlike the language details that gradually slip away out of disuse, I know that I will remember this pie. It participated in a dear yearly ritual: ringing in the New Year with my own set of Woo Girls. As I've said to many of my friends, I have always found New Year's a disappointing holiday - until I started spending it with my Woo Girls. This was our third celebration together, and it just gets better every year. And this pie was...the icing on the cake? Or something like that. In any case, it was rich, good, and easy - just allow time for each layer to set, and you'll be enjoying the yumminess before you know it.

This recipe is from my Christmas gift to myself, Baked Explorations. Coming out of the NYC bakery Baked, it is full of rave-reviewed recipes that are new takes on classic American baked goods. The photos are gorgeous, the reinventions creative, and for once I want to make the entire pie/tart section of a cookbook - and I'm a cake girl!

A few notes:
  • Be aware that American desserts mean butter, cream, corn syrup, and even shortening sometimes.
  • I would use the unsalted butter as indicated; I did not, due to butter availability in the kitchen, and the dessert tasted salty to me. There is plenty of salt in the cookies to complement the sweetness of the filling.
  • Each layer of the pie needs time to set in the refrigerator or freezer, so make sure to build that waiting time into your plans. I've bolded the waiting time in the recipe below.
  • Let the finished pie sit in the freezer long enough for each layer to come to a consistent hardness; we were in a rush to eat the pie, so the ice cream was not as solid as the fudge layers, which I found harder to eat since it squashed out of the middle.

That being said, here's the first pie I tried from Baked Explorations (to be shortly followed by the first cake):
WOOOOOHOOOOOOO!

Mississippi Mud Pie (there I go again spelling it!)
from Baked Explorations

Chocolate Cookie Crust Ingredients:
30 chocolate wafer cookies, about 6 oz.
1 T granulated sugar
6 T (3/4 stick) unsalted butter, melted

Filling Ingredients:
4 oz. dark chocolate (60-72%)
1/4 C plus 1 T heavy cream
3 T unsalted butter
2 T light corn syrup
1 C confectioners' sugar, sifted
1 T Kentucky bourbon
1 pint good-quality coffee ice cream
1/2 C toasted pecans, coarsely chopped

Bourbon Fudge Topping Ingredients:
2 T heavy cream
2 T unsalted butter
1 T light corn syrup
3 oz. good-quality dark chocolate (60-72%)
1 tsp Kentucky bourbon

1. Chocolate Cookie Crust
Pulse the wafer cookies into fine crumbs with a food processor (if you don't have a food processor, place the cookies in a heavy duty ziplock bag and beat them with a rolling pin - but beware of holes in the bag!). Makes about 1 1/2 C. In a mixing bowl, stir together the crumbs and sugar.
Pour the melted butter over the crumbs and mix well. Transfer the crumb mixture into a 9-inch pie plate and press it into the bottom and up the sides. Use the back of a large spoon or the bottom of a measuring cup to get an even crust. Set the crust aside in the refrigerator.

2. Filling
Place the chopped chocolate in a large heatproof bowl.
In a medium saucepan, bring the cream, butter, and corn syrup to a simmer. Remove the mixture from the heat, pour it over the chocolate, and let sit for 1 minute. Then whisk the chocolate mixture until it is completely smooth. Whisk in the confectioners' sugar and bourbon.
Spread the fudge evenly over the bottom of the pie crust, cover it, and refrigerate for 2 hours.
Soften the coffee ice cream by placing the container in the microwave for 10 seconds on high. Put it into a large bowl and use a rubber spatula to beat it until it is slightly malleable. Spread the ice cream over the chilled fudge filling, sprinkle it with pecans, gently pressing them into the ice cream, and freeze the pie for about 1.5 hours, or until the ice cream is firm.

3. Bourbon Fudge Topping
In a small saucepan over low heat, heat the cream, butter, and corn syrup together until the mixture begins to simmer. Remove the pan from the heat and add the chocolate. Whisk until the fudge is smooth - if you still have a few stray chocolate chunks, reheat the mixture over very low heat until they are completely melted. Stir in the bourbon.
Beat the fudge topping until it reaches room temperature, and pour it over the ice cream and pecan layer in a zigzag pattern. Freeze the Mississippi Mud Pie until it is set, about 20 minutes. To serve the pie, cut it with a warmed sharp knife.

The pie will keep in the freezer, tightly covered, for up to 4 days.

Happy New Year indeed!

Wednesday, June 30, 2010

Loving Paris in June


And let the summer travel posts begin...

Last week I spent two days in Paris on my way to Israel (I tell myself that this is a way to get used to the time zone, but let's face it, really it's an excuse to produce a post like this!), and the beautiful pastries wet my appetite for my three weeks in Paris in August.

This was a visit that, more than the others I took this past April or in May 2008, reminded me of the significance of my student days in Paris. Perhaps it was the time I spent in the Marais this time, or the long hours I took walking the city, but whatever the reason, these two days brought to mind the girl I was 9 years ago, just at the cusp of developing into who I am now.

The semester I spent at the Sorbonne in 2001 was a formative point in my adult life; in particular, I was at an important place in developing my sense of aesthetics. I was constantly struck by design throughout Paris - in the art museums, in architecture, in advertisements, in clothing, in the juxtaposition of the new and the old in an historic but modern city. I gathered pictures from magazines and ads until I had a notebook stuffed with scraps of paper, and I even tried to draw a little bit. Living outside of the U.S. allowed me to let go of my perceptions of what art is, and simply listen to my personal experience of sensory expressions - which brings me to the food in this post again.

My aesthetic sensibilities are at their happiest, perhaps, with beautiful food. I know I rave constantly about Pierre Hermé, but really, he is an artist. His medium is of the highest quality - no one could beat the textural and flavorful perfection of his macarons - while he also executes a creativity in flavor combinations and presentation that takes the technical work to a level of sophistication that is so pleasing to me. The photo above is of his Ispahan croissant; Ispahan is his signature "fetish" collection flavor that combines raspberry, rose, and lychee, with some almond paste as well in the croissant. Brilliant, right?

I devoured this croissant, and then ate the crumbs from the bag. Amazing pastry, striking filling, lovely sweet glaze.


And OF COURSE I got some of his macarons, in flavors I hadn't tried yet (except for the caramel): clockwise from upper left, Mosaïc (pistachio, griottine cherry, and touch of cinnamon), Mogador (passion fruit and milk chocolate), Arabesque (apricot and pistachio), and Infiniment Caramel (salted butter caramel). I am always surprised by the touches of bitterness or sourness he allows to remain in his flavors; the passion fruit was certainly on the sour side for me, and the caramel actually has a bitter edge to the burned sugar flavor. Few pastry chefs would make that gusty choice in the States! I think Mosaïc was my favorite this time.


I ran into this place while walking around town, and while its Asian-inspired flavors were interesting, I just had to buy...


...one of these: a Chocoron, or Chocolate-Dipped Macaron. Oh yes.


Raspberry and chocolate isn't my absolute favorite combination, but I could not resist the colors of this amazing confection. Sadaharu Aoki's macarons in general had stiffer shells, which structure fit the chocolate dipping better than a soft Hermé would have done. It is truly difficult to look at this photo without being able to take a bite of one right now.


Berthillon's ice cream was a must-try, and I was glad I sat down to eat it at Ma Bourgogne at the Place des Vosges, even though it cost three times as much as getting a few scoops on Ile St. Louis. The honey nougat and the café dauphinois were fabulous with the gavottes that accompanied them.


And the final culinary highlight of the two days was this religieuse from Des Gâteaux et du Pain; I literally have wanted to try this for two years, and this time happened to be staying a few blocks away from the bakery. After this trip, I highly recommend staying in the 15th arrondissement for high quality pastry and baked good options.


Choux pastry (think cream puffs) filled with salted caramel pastry cream, coated in caramel icing, held together with caramel buttercream piping.


I don't usually talk like this, but...GET IN MY BELLY!


A bientôt, Paris!
Enhanced by Zemanta

Sunday, May 16, 2010

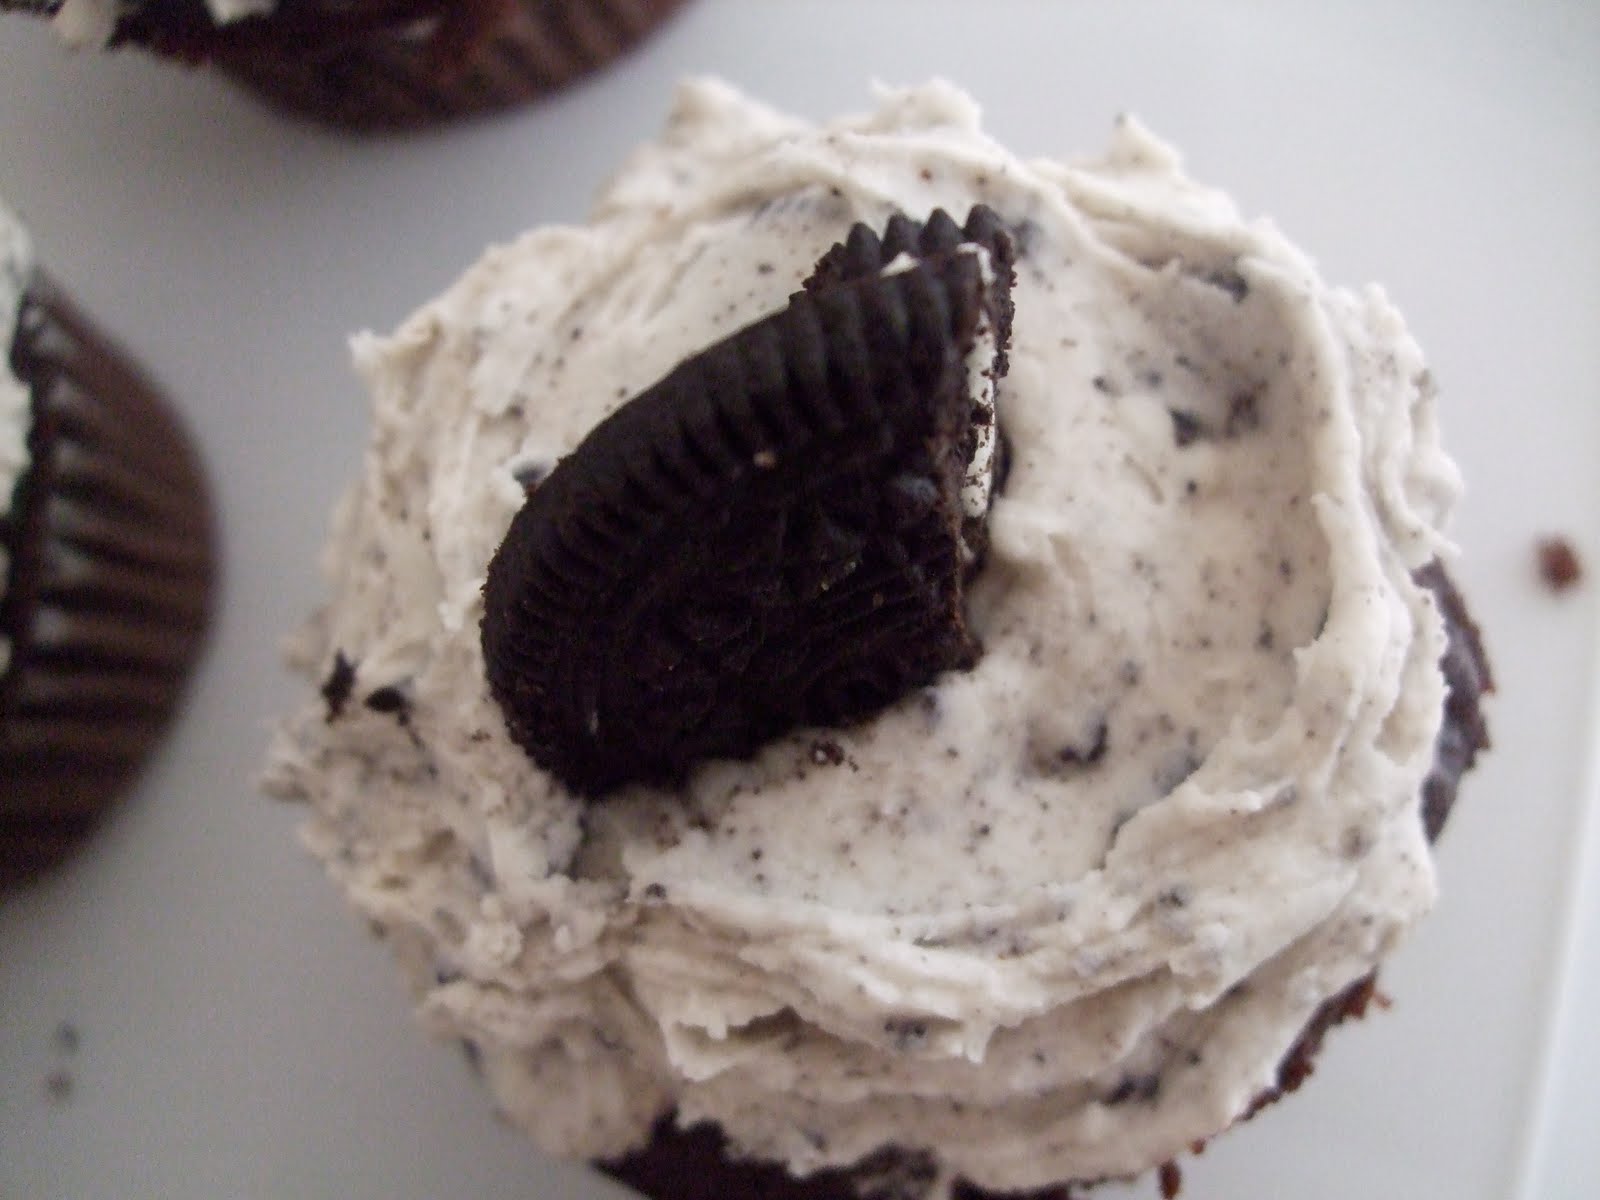
Cookies-n-Cream Cupcakes and The Amazing Scoop


There once was a little girl who was very attached to cookies-n-cream ice cream. She had her occasional moments with butter pecan and mint chip, bubble gum and rocky road, but if she followed her heart, it always led back to cookies-n-cream. It wasn't just that there were Oreos to be dug out of the sweet treat, but that alchemy of chocolate cookie chunks, their creamy centers, the ice cream melding it all into one - the cookies and the cream were magic together.

This same little girl loved receiving gifts. Not because she loved things, but because she could tell with a gift whether or not someone really knew her; whether or not they paid attention to her loves; whether or not they wanted to show her that they cared for her by sharing in that same love.

Over the course of her short years, she began to realize that most gifts did not live up to these expectations, and tempered them accordingly. Other people weren't mind readers, after all. Why live with disappointment when she could live with moderate satisfaction?


Little did she know that one day, her jaded 12-year-old mind would be revived. That she would in one moment glimpse that ideal of gift-giving and decide to never let it go again. That ideal showed up in the form of a cookies-n-cream cake.

In the midst of a week of Nutcracker ballet performances, with the excitement of her first solo role and Christmas looming two weeks later, her birthday was an afterthought. A brief meal to be followed by another performance. But at that meal, that cake - the cookies-n-cream cake - appeared without presumption nor guile in the hands of her grandfather.

She was amazed and starry-eyed before the Oreo-studded, buttercream-coated wonder. Its loveliness would please her tongue, but its taste would fade away before the knowledge that it was a gift. Her grandfather knew that she loved cookies-n-cream, remembered that fact on her birthday, made the effort to buy the cake, and presented it to her as a complete surprise. This was love.

*********

This post is dedicated to my grandfather, who passed away 8 years ago today, for showing me the closest thing to unconditional love on earth, and for reminding me that I should not ever give up on my ideals. I love you and miss you, Gung Gung.


I really cannot think of a better introduction for these cookies-n-cream cupcakes; while not love incarnate, they are the closest thing to cookies-n-cream in cake form that I have been able to produce. I have posted previously on Oreo cupcakes with 7-minute icing, or buttercream icing, but these are the latest rendition. I added crushed Oreos to the buttercream, which gives them a bit of the feel that the ice cream creates. I also confirmed my theory that Reduced-Fat Oreos actually work the best in this recipe, since they grow soft when pushed into the middle of the cake (yes, there's a whole Oreo in the middle of the cupcake!), unlike regular Oreos, which stay crunchy after baking.


So, here's how to do it:
1. Make a Devil's Food chocolate cake mix from Duncan Hines. After you scoop* the batter into each cupcake mold, press a whole Oreo into the batter so that the batter squooshes over the top of the cookie's edges. Smooth the batter over the cookie and bake according to the instructions for the cake mix.

(If possible, use one of these scoops - it will make your life so much easier! See my notes below)


2. After cooling the cupcakes, cream together the buttercream, slowly adding the powdered sugar to the butter and vanilla, followed by the milk/cream:
1 C (2 sticks) salted butter
1 tsp vanilla extract
4 C (1 lb) powdered sugar
1-2 T milk or cream

Add 10 crushed Oreos (crush in a heavy-duty freezer bag) and mix in well.

3. Spread the cookies-n-cream buttercream generously on each cupcake. Top with a fourth of an Oreo. This whole recipe should require one whole package of Reduced-Fat Oreos and should make about 24 cupcakes.


*I used to feel that a scoop like this one from Pampered Chef was unnecessary in my kitchen for anything other than ice cream, but have realized through trying to replace it with measuring cups, ladles, and spoons, that nothing does the job in baking nearly as efficiently. Not only does the scoop measure out exact amounts each time, but it has the all-important scraping mechanism to push the batter or dough out of the scoop. Runny batter pours out well without dripping too much, and stiffer dough packs in nicely and comes out cleanly with the scraper. These are the scoops I used for my compost cookies.


Reblog this post [with Zemanta]

Tuesday, June 9, 2009

Steamed Mochi


Who knew that steamed mochi was the easiest thing in the world to make? Granted, I have a rice cooker, but even without special equipment it is a simple thing.

I have long been addicted to the mochi topping (always with the eurotart flavor and diced strawberries) at Pinkberry-esque frozen yogurt shops; it has something to do with the sweet chewiness of the mochi, which satisfies me almost like a good homemade marshmallow does. So when I read this post about strawberry daifuku mochi on Chocolate and Zucchini, I made it almost immediately. Thank goodness I happened to have glutinous sweet rice flour on hand!


I made my family's baked mochi recipe earlier this year, which I suspect came out a bit differently than it should; I had been wanting to try it again, but the giant 9x13 pan of chewy rice product was not super appealing to me since it's tedious to cut up and almost impossible to finish (even when I farmed it out to all my friends last time some still ended up eating through a container on top of my fridge). This, however, was perfect - just enough mochi to cover 10 strawberries in a thin layer, or 6 balls of ice cream. And small enough to make in my teeny-tiny rice cooker.


Don't be intimidated by the length of the text below; basically, this recipe involves dumping the ingredients into the cooking bowl, steaming for 10 minutes, and then cutting it up. Really, really easy.

I've made it twice so far; the first time I wrapped strawberries and blueberries in the mochi, and the second time I made it pink (!) and wrapped balls of TJ's nonfat plain frozen yogurt. I'm not a pro yet at handling the fresh mochi, but it was fun to use and eat, of course.


Steamed Mochi
(from Chocolate and Zucchini - read the original post for info on different kinds of mochi)

100 g or 3.5 oz glutinous rice flour (mochiko flour works - find at an Asian market)
50 g or 1/4 C granulated sugar
2/3 C cold water
a few drops of food coloring if desired
plenty of potato or corn starch for dusting (potato is lighter but more expensive and rare)
optional: 10 small strawberries or 20 large blueberries, red bean paste
OR ice cream/frozen yogurt

Berry option prep:
Rinse, dry, and hull berries. Coat in red bean paste if desired and place in refrigerator on a plate.

Ice cream/frozen yogurt option prep:
Line a small rimmed baking sheet that will fit in your freezer with parchment paper or wax paper. Scoop your ice cream or frozen yogurt into small balls and place evenly on baking sheet. Freeze in your freezer for at least 1 hour prior to wrapping in mochi. Place the container in which you will store the completed mochi ice cream balls in the freezer as well, so that it will be cold when you place the mochi-covered balls in it (the mochi will be warm when you wrap the balls, so it will melt them a little and cause them to take a while to firm up in the freezer once completed).


If you have a microwave: combine the rice flour, sugar, and water (and food coloring) in a plastic or glass bowl, and stir to dissolve. Cook for 2 minutes in the microwave on medium, stir with a silicone spatula, and repeat once or twice, until the mixture is thick and slightly translucent.

If you have a rice cooker: combine the rice flour, sugar, and water (and food coloring) in the bowl of the rice cooker, and stir to dissolve. Cook for 10 to 12 minutes, stiring once or twice during that time with a silicone spatula, until the mixture is thick and slightly translucent.

If you have a steamer: combine the rice flour, sugar, and water (and food coloring) in a heatproof bowl that fits inside your steamer, and stir to dissolve. Place the bowl in the steamer and cover the bowl with a heatproof plate or cover. Close the steamer and cook for 10 to 12 minutes, stiring once or twice during that time with a silicone spatula, until the mixture is thick and slightly translucent.

(above: pink mochi that's finished cooking in the rice cooker)

While the rice flour mixture is cooking, pour a generous layer of potato/corn starch in a rimmed baking sheet, and keep more starch on hand. When the rice flour mixture is ready, pour it onto the prepared baking sheet; it will be super sticky. Sprinkle generously with more starch, pat the dough to flatten it as thinly as possible (caution: it will still be rather hot), and use a pastry cutter or a knife to cut it into pieces big enough to wrap your berries or ice cream, square or triangular pieces. I handled the dough with non-latex gloves. The dough will get less flexible as it cools, so try to work at a brisk pace. Save the unused starch in a container to use again next time.


If using berries:

Remove the coated strawberries from the fridge. Take one piece of dough, stretch it gently so it will be large enough to envelop a strawberry, and place it on the palm of your hand. Dust the starch off the top surface with a pastry brush, place a coated strawberry in the center, tip side down, and wrap the dough around it, twisting the edges gently to seal into a pouch, and making sure the dough doesn't tear.

Place the daifuku seam side down on a plate dusted with potato starch, and repeat with the rest of the ingredients.

Let rest for an hour to set and cool to room temperature before serving. Leftovers should be covered and stored at room temperature, but note that strawberry daifuku taste best on the day they're made, so don't make more than you plan to eat within a day or so. They'll get a little mushy on the second day:


If wrapping ice cream/frozen yogurt balls:


Remove frozen balls from the freezer and place the storage container next to your work area. As with the berry instructions, dust each mochi piece off with a pastry brush and work quickly to wrap each ball with the mochi, pinching the seams together. Place in the cooled storage container and freeze until solid before serving.

Friday, August 29, 2008

Bulgarini Gelato: Altadena's Best-Kept Secret


All the reviews will tell you the same thing: Bulgarini Gelato is as out-of-the-way as an ice cream store can get, but also the best gelato you can get in L.A.!

Since it seems that I'm making my way there about once a week, I figured I should write about it, although I could just keep the secret to myself...but I'm not feeling that cruel today.

As you can see on their website, they use the real, old-world method of making gelato, resulting in thick, creamy confection with the freshest of flavors. The first time I went there, there were Italians sitting at the next table over who said that this stuff is better than what you often get in Italy, since gelato places there are even starting to use mixes.

While the shopping center in which Bulgarini is located appears to be somewhat run-down, the corner with the gelato shop is set back from the parking lot, cozy and comfortable. The shop is just big enough to serve the ice cream to the steady stream of customers, and out front there are rustic wooden tables and chairs under quaint umbrellas.

Pistachio is by far their most popular flavor, as I confirmed when I found that they had run out of it the first time I was there. The flavors vary by what is freshly available that day, which makes it fun to sample new things each time (generously given out with smiles) before settling on one's selection. If you get a small, you can choose up to 3 flavors in your cup, and up to 4 in a medium, so they happily accommodate the indecisive and the combination-lover. Come to think of it, I am both of those - I never want to limit myself by choosing just one out of many fabulous options, and I revel in trying flavors together, so this works well for me!

This last time, strawberry and pistachio hit it off together in my mouth (new marshmallow flavor, perhaps?) as the softly sweet berry sang in harmony with the ultra-nutty pistachio. I had also gotten almond (see, I had to get 3 flavors), which was so packed full of almonds that I almost felt like I was eating almond butter. Between the natural flavors and reusable cups (remember to throw them in the cup bin inside), this is a somewhat green option, too. Not your average ice cream joint!


Bulgarini Gelato
749 E. Altadena Drive
Altadena, CA 91001
626.791.6174

Tuesday, June 3, 2008

From MacDo to Magnum


A few thoughts on my varied food experiences in Israel...


That's right, I sampled McDonald's ice cream in Jerusalem, and it's just as good.

When I started traveling internationally as a teenager, it was comforting to me to see McDonald's, Burger King, and Coca-Cola products in other countries. I am still fascinated by how each of these enterprises is marketed in other cultures: kosher McDonald's in Israel, Coke Zero in glass bottles in Paris cafés, two-story McDonald's in Beijing serving pineapple sundaes, Coca-cola logos painted on the streets in Guatemala in front of Catholic cathedrals. In Israel, hamburger patties were served on pita bread with tomato-cucumber salad and French fries. The McDonaldization of the world is happening, but not without some contextualization that keeps worldwide McDonald's packed. You know they're doing well in Jerusalem when you see signs blocks away from the restaurant pointing the way there! For better or worse, this is what I've observed in my travels.


On the other hand, Old City Jerusalem offers places like the Armenian Tavern, where one descends a staircase into a stone building to order stuff like this. To be honest, I wanted to try something new, so I just ordered an assorted plate of items I can't identify. The folded bread in the bowl is Armenian pizza (not very cheesy but tasty), the balls on the left are fried dough stuffed with ground meat, the dark sausage on the lower right was an intensely flavored something, and in the upper right there is a marinated dried kind of meat. An adventurous meal, even with the lack of food names.

Can't beat falafel! The best was freshly fried at Damascus Gate (only 7 shekels!), but this one was good too. I gotta learn how to make it from scratch.


Lovin' on the varieties of salads available at meals...this was the amazing dining hall at kibbutz vacation resort Ein Gev on the Sea of Galilee.

We had opportunities to buy these ice cream bars at every stop; they're unfortunately not distributed in the States. My favorite Magnum Desire bars have thick, quality chocolate on the outside, and rich, creamy ice cream with chocolate chunks on the inside.

Intense chocolate! Definitely worth the lactose pills.

And last but not least, Israeli s'mores ingredients: kosher pink and white marshmallows (strawberry and plain), Petit Beurre cookies (the Hebrew on the package is "Petit Beurre" transliterated), and milk chocolate bars. Some students claimed these were the best s'mores they'd ever had...

Isn't Israel fabulously diverse?